
In this post we are going to take a look at the features of the Azure IoT Hub. We will basically connect a sensor (ESP8266 based WiFi module) to the Azure IoT Hub.
We will focus on the Azure IoT Hub related connection therefore we will use a ready made ESP8266 module by Adafruit known as Huzzah. You can get more information about the Huzzah here. Basically it is a ESP8266 board with all pins broken out so we can easily use it on a breadboard. It also includes a very handy micro USB interface.
Creating an Azure IoT Hub
First we need to login to the Azure portal and create our IoT Hub. Microsoft offers a free version of the IoT Hub. With this free version, or tier as they name, it you get 8000 messages per day for free. Which is more then enough for the project we are building in this post. Here is a step by step guide to create an IoT Hub on the Azure platform:
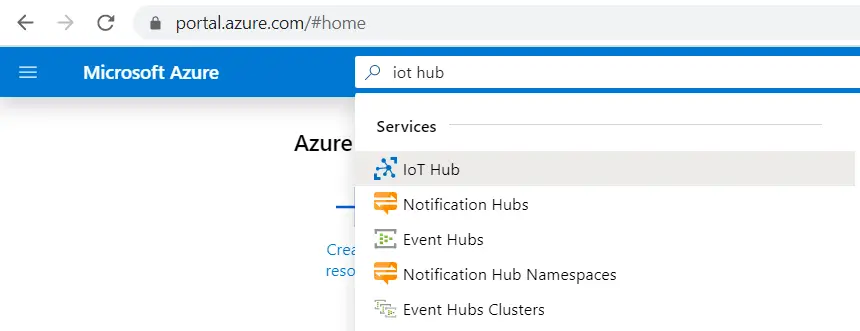
1. Login to the Azure portal. And search for IoT Hub:

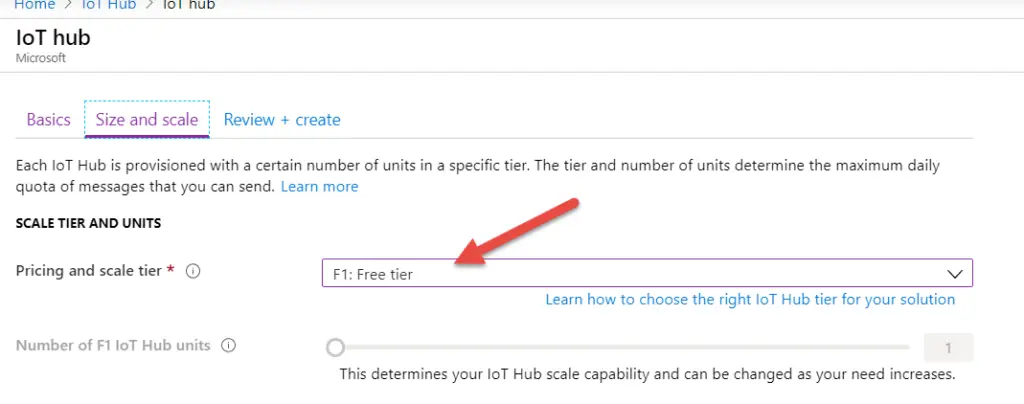
2. Add a new IoT Hub and enter the required parameters:
Make sure you select the “Free Tier” under the pricing and scaling tab, so we can profit from the free 8000 messages per day.
3. Click on “Review and create” and create your very own Azure IoT Hub.
Create device in Azure IoT
Once we have got the hub up and running, we need to create a device within our IoT hub. You can use the following steps to accomplish this:
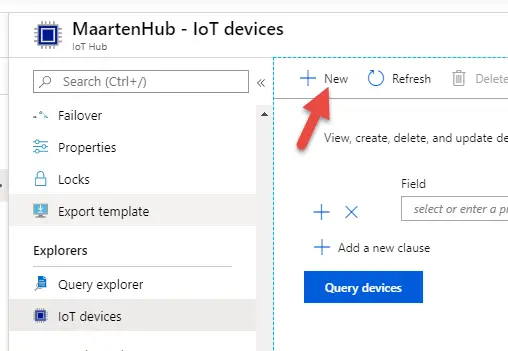
1. Go to your hub and go to “IoT devices” click on “New”
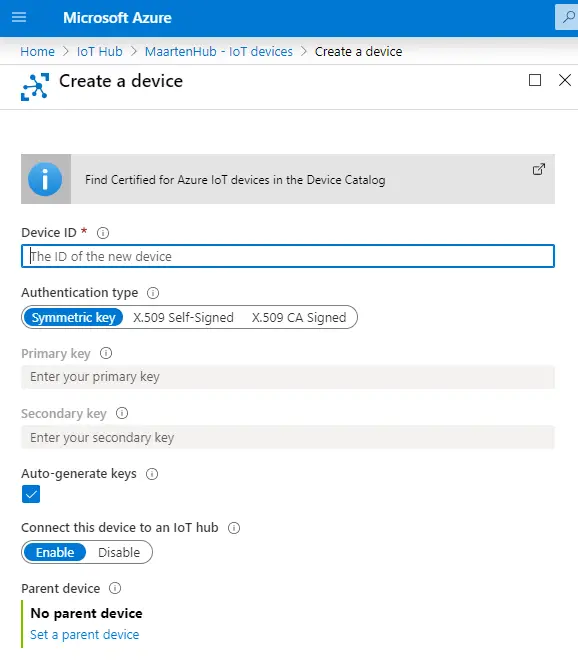
2. Give the device a name and leave the authentication methods etc to the default settings. We will use symmetric keys for this example. This might not be in line with your requirements so please consider if this is the proper authentication method for your purpose.
Our device is now created, we can now continue to flash our Adafruit Huzzah device.
Install Arduino and prepare for our Huzzah board
Before we can flash our Huzzah, we first need to download, install and prepare the Arduino IDE. I used the basic steps provided on the Microsoft Github page. But I found out that these steps are no longer valid in 2020. There seem to have been some updates recently which break the manual described there. Instead of creating a separate new platform.local.txt I modified the existing platform.txt and added these two build parameters:
-DDONT_USE_UPLOADTOBLOB -DUSE_BALTIMORE_CERT
After that I was able to check, compile and flash the firmware.
Monitor telemetry messages send to the hub
Once we got the software flashed to our Adafruit Huzzah, we can monitor messages send to our hub. There are several ways to monitor this, but I found the Azure shell way to be the most useful method. To monitor messages you can follow these easy steps:
1. Click on the little shell icon next to the search box in the Azure portal:

2. Install the Azure IoT extension using the following command:
az extension add --name azure-cli-iot-ext
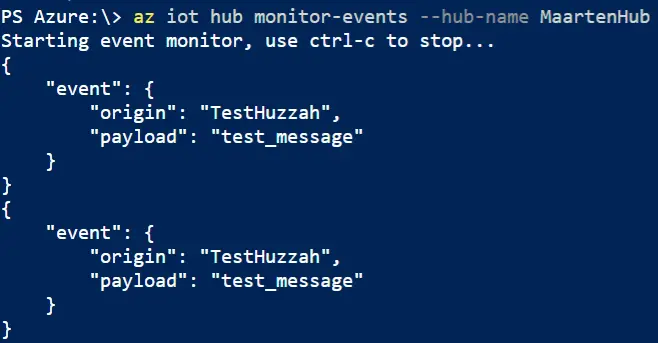
3. Type the monitor command:
az iot hub monitor-events --hub-name MaartenHub
4. If it all went well you should see the messages arrive. Please not that you might need to restart your Huzzah for example by re-seating it in the USB port.
Congratulations! You have just connected your Adafruit Huzzah to the Azure IoT Hub.
4 thoughts on “Connecting an ESP8266 (Adafruit Huzzah) to Azure IoT Hub”
Comments are closed.
Recent Posts
The time is finally come! Samsung have released their Galaxy Watch 4 series of watches. It features Google Wear OS 3. and it comes in two models, being the standard model and the watch 4 classic. In...
Microsoft 365 Defender cross check with on-premises Active Directory
Recently I was reviewing the new Microsoft 365 Defender portal and I noticed that a few endpoints were missing from the device inventory. This got me thinking that it would be great if I could...
Hi, can you clarify how you modified the platform.txt?
Hello, you just open the file, it is about line 80, and add the parameters. Mine is as follows:
# This can be overriden in boards.txt
build.extra_flags=-DESP8266 -DDONT_USE_UPLOADTOBLOB -DUSE_BALTIMORE_CERT
I just saved the file and ran the demo. Worked.
Hello, you just open the file, it is about line 80, and add the parameters. Mine is as follows:
# This can be overriden in boards.txt
build.extra_flags=-DESP8266 -DDONT_USE_UPLOADTOBLOB -DUSE_BALTIMORE_CERT
I just saved the file and ran the demo. Worked.