You have probably been using Home Assistant for quite a while, but lately you have wondered how to enable remote access to your Home Assistant installation. This is a very common question and one way to expose your Home Assistant installation to the outside world is to use the Home Assistant Cloud offering by Nabu Casa. In this article we will look at the question whether or not the offering by Nabu Casa is worth it. If you are looking for a short answer, then here is the answer to the question:
The Home Assistant Cloud offering provides good value for money by offering five key features:
- Access from anywhere, this allows you to access your Home Assistant installation from anywhere.
- Easy connection to voice assistants, this allows easy integration with Google Assistant and Amazon Alexa.
- Security, Nabu Casa takes care of the security and hardening. You no longer need to worry about this.
- Supporting Home Assistant development, you are supporting the further development of Home Assistant by getting a subscription.
- Text to Speech, Nabu Casa offers a natural sounding text-to-speech engine.
All in all you get quite a lot of features for five dollars per month.
In the remainder of this article we will take a look at all the features, setup and other interesting stuff about the Home Assistant Cloud offering.
Home Assistant Cloud Features
Access to Home Assistant from anywhere
One of Home Assistant Cloud’s main features is the easy remote access to Home Assistant. I highly recommend that you use Home Assistant Cloud for this, as manual configuration can be very easily setup the wrong (insecure) way. Nabu Casa will take care of all the hassle, like setting up a reverse proxy, SSL certificates etc.
You can easily enable access to Home Assistant by utilizing the Remote UI option. You can enable this option by using the following steps:
- Open configuration and then Home Assistant Cloud.
- From the Integrations section enable Remote UI.
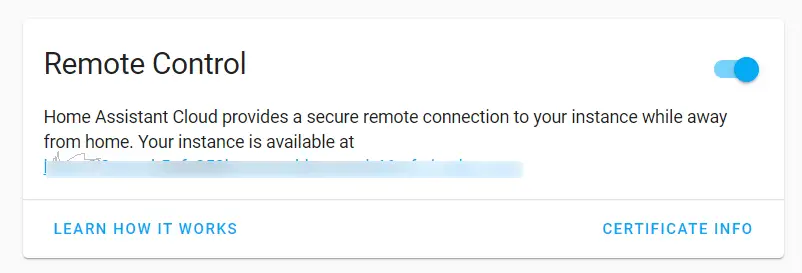
This is all that is needed to configure the Remote UI. This will take a couple of seconds before it is deployed in the Nabu Casa cloud. Once enabled you can then reach your Home Assistant installation from the suggested URL.
I recommend that you also enable additional authentication protection such as MFA (Multi Factor Authentication)
Easy connection of voice assistants
Lets look at the Home Assistant Cloud feature to connect voice assistants. I currently own multiple Google/Nest Home assistants. So I took a look at this process. The process is very easy with Home Assistant cloud. If you compare this to the manual process this will be a great time-saver. The manual process involves settings up things like DNS, SSL certificates and/ or opening ports on your router. This is certainly do-able for someone who works in the IT field. But it is a very complex setup for someone who does not do this on a daily basis.
Even though the manual setup is for free, it does present some risks if you not correctly done. One could expose the wrong parts of Home Assistant and put your installation at risk. Furthermore all of the setup aspects need regular maintenance, such as security updates.
Lets look at how to setup the Google Assistant with Home Assistant cloud. First make sure you have the following prerequisites ready:
- Have the Home Assistant Cloud component setup. For more information see the later Setting up Home Assistant paragraph.
- Make sure you have a Google Assistant enabled device ready. Like a Google/ Nest Home.
For the rest of the configuration I will walk you through all the steps:
- First we need to enable Google Assistant support. Go to Configuration from the left hand side, then go to Home Assistant Cloud under the cloud setting make sure you enable Google Assistant as shown in the screenshot below
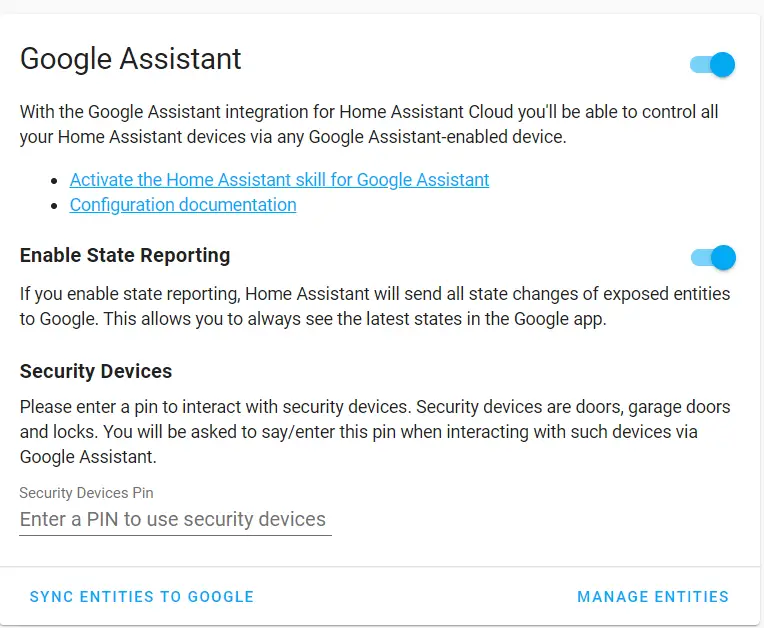
I recommend you set Enable Status Reporting. This will periodically sync the status of your devices to the Google servers. This way you always have an actual view of your devices within Google Home.
Manage entities
You can use the Manage entities button to limit the devices that are send to Google. By default most entities will be synced. This will be fine for most users, but if you want more granular control you can control it through the manage entities section.
Note: when you enable the Google Assistant integration you will be asked for a authorization. Just follow the steps Google suggests. - Next we need to setup our Google Home application. This depends on your mobile platform. But I have documented the steps for Android here below. The steps should be similar for iOS devices.
– Open the Google Home app.
– On the top left click on the “+” sign.
– Choose configure an device
– From the works with Google section select already configured device.
– Now search for Home Assistant Cloud by Nabu Casa and follow the steps.
If all went well you should see your Home Assistant devices pop-up within Google Home. This will allow you to control Home Assistant devices by voice.
Supporting Home Assistant development
While this is not directly a feature so to speak. For me this is one of the key reasons to take a subscription of Home Assistant Cloud. When you take a subscription you directly support future Home Assistant development. Naba Casa commits to this by making the following promises:
- Nabu Casa is contributing features to Home Assistant to make it easier to install, manage and make it accessible to a wider audience.
- Nabu Casa is responsible for hosting the Home Assistant community. This will make sure that the community remains a ad-free experience.
- all cloud based integrations such as: Amazon, Google and future ones will be contributed to Home Assistant so people can run their own integration if wanted.
As you can see Nabu Casa does not give us direct numbers in terms of a percentage that goes to Home Assistant development. But they are transparant about the things they do for Home Assistant.
Nabu Casa text-to-speech
One other main feature is the Nabu Casa text-to-speech engine. It promises to deliver a natural sounding voice. I have tested this text-to-speech engine. Lets first look at how you can utilize this feature.
To use the cloud based text-to-speech engine you can call a service from Home Assistant. The easiest way to test this is from the developer tools:
- Click on Developer tools from the sidebar.
- Within the developer tools, select the Services tab
- For my example I use a basic text, pronounced in English (en-US) and spoken by a female voice:
entity_id: media_player.living_room
message: Testing Nabu Casa TTS
language: en-US
options:
  gender: female
Once you entered the service Data in YAML format. You can click on Call service:
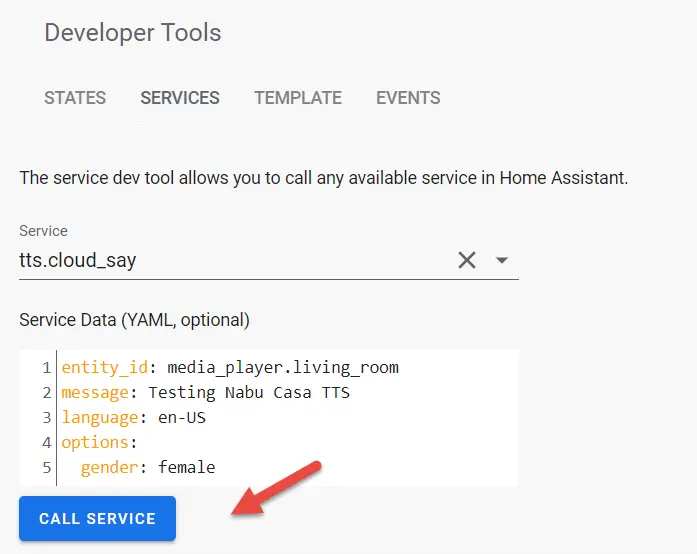
If all went well you should here a nice TTS announcement.
To give you an idea of what the text-to-speech sounds like I have included a little video clip of the TTS feature and what it sounds like below:
You can also use the TTS service from automations in Home Assistant. Here is an example of an automation that uses the TTS feature:
- Create the automation like you would normally do, with all the triggers and conditions.
- In the actions pane select Call service as Action type. As service select tts.cloud_say
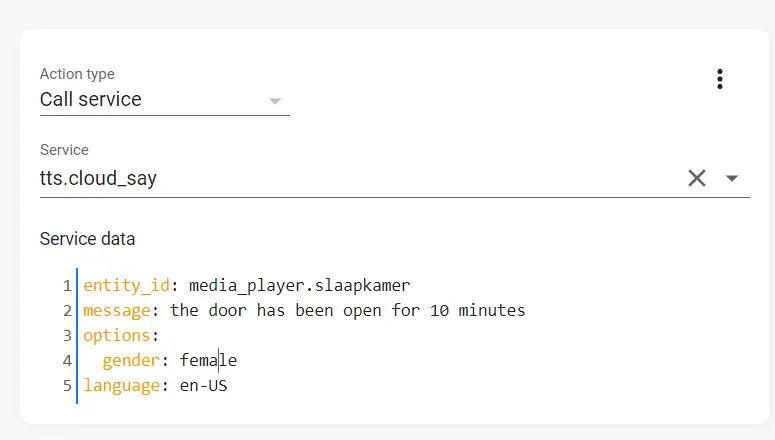
- Next set the service data similar to the above example development sample.
That’s it, you can now use TTS in your automations. This is great for reminders such as when the door was left open, or if you need to put the trash bin outside.
Setting up Home Assistant Cloud
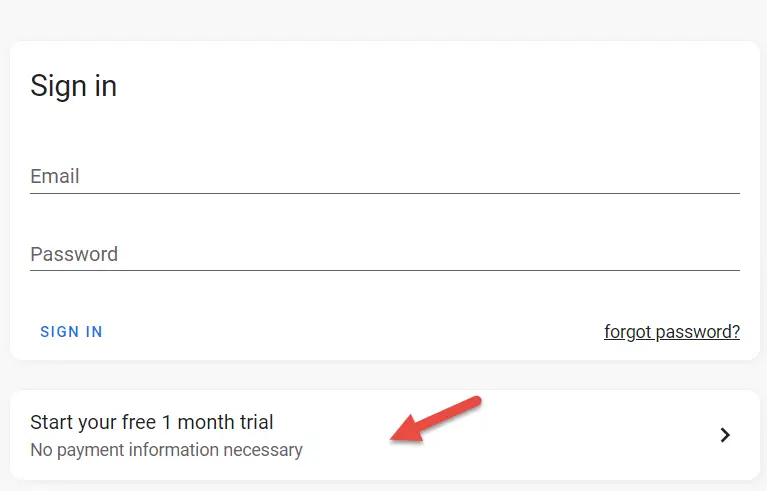
So are you convinced by the set of features listed above and do you want to give Home Assistant Cloud a try? Well good news, because you can trial Home Assistant cloud for free for one month. In a few easy steps you can set-up your trial:
- From the Home Assistant user interface go to Settings, and then go to Home Assistant cloud.
- Click on the Start your free 1 month trial.
- Next choose an account name and password and click on START TRIAL.
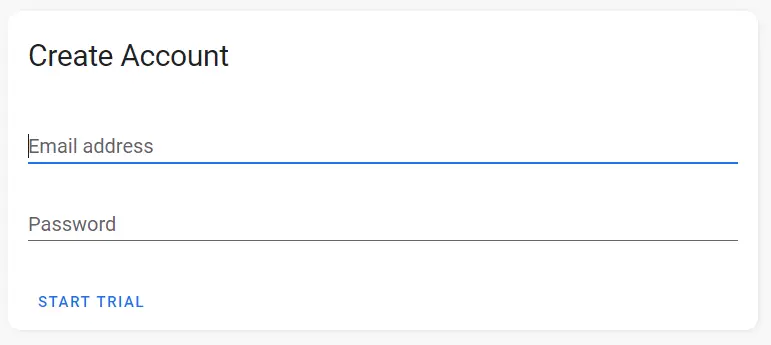
- That’s it, you should now have Home Assistant Cloud setu-up. That was quite easy right?
You can now follow the configuration steps described on the website of Nabu Casa, or follow the steps written in this article.
Conclusion and wrap-up
In this article we took a look at the Nabu Casa (Home Assistant Cloud) offering and whether or not it’s worth your $5,- per month. I definitely think its worth your money. For one you no longer have to worry about making Home Assistant accessible from outside of your network. Nabu Casa provides a secure way of exposing your Home Assistant installation.
Furthermore Home Assistant cloud offers some other features such as easy integration with cloud solutions such as Google Assistant. The integration of these cloud services are really easy with Home Assistant Cloud, but take quite some setup and troubleshooting when you leverage the integration yourself.
Last but not least, you get a nice TTS function available that provides much better fluency then the Google equivalent. And by signing up to the Nabu Casa service you also support Home Assistant future development.
Recent Posts
The time is finally come! Samsung have released their Galaxy Watch 4 series of watches. It features Google Wear OS 3. and it comes in two models, being the standard model and the watch 4 classic. In...
Microsoft 365 Defender cross check with on-premises Active Directory
Recently I was reviewing the new Microsoft 365 Defender portal and I noticed that a few endpoints were missing from the device inventory. This got me thinking that it would be great if I could...