As you might know, Google has shut down the Works with Nest program since the 31st of August 2019. Since then there was no official way to integrate Nest products with Home Assistant. Lets not talk about how bad of a decision I find this by Google, but lets look forward! There was integration known as badnest which was based on Google’s own Web API. But this integration was unstable, and required reauthenticating every once in a while. Luckily there is now a new integration available for Home Assistant that uses the Google SDM (Smart device Management) API. This integration is available since version 0.118.0 of Home Assistant so make sure you are running this version before trying any of the steps below.
Setting up the new integration requires quite a few steps, and if not done correctly it can be hard to troubleshoot. In this article I will guide you through all the required steps, and some of the common errors that may be seen. I also had a lot of trouble getting this integration to work in the first days. I want to thank Alan Porter for creating this integration.
Google Device Access Registration
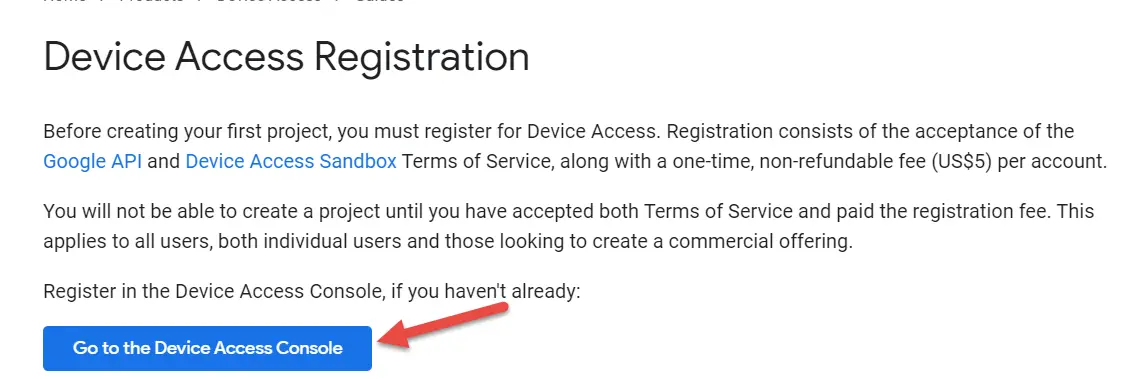
The first major step that we need to take is to register at Google using the Device Access Registration. This will give us access to the Google Smart Device Management API. I have created screenshots of this process which are hopefully helpful.
- First go the the Device Access Registration page. Click on the the button Go to the Device Access Console.
- Accept the Terms of Service.
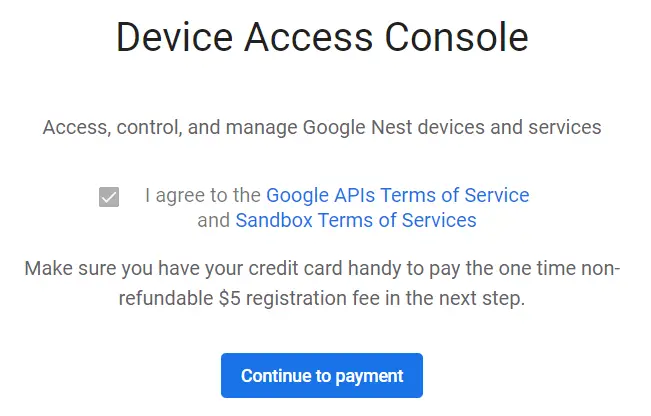
- Next up, Google will ask you to pay a fee of $5, to get access to the SDM api. Ridiculous? Yes if you ask me, but there is no way around this.
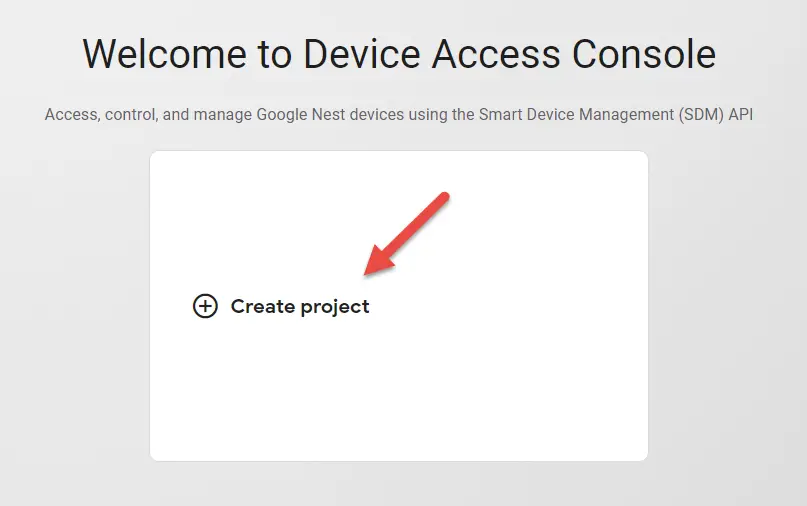
Important note: do this with the account that has access to your Nest devices. - Once you have paid, you should have the Google Device Access console visible. Click on Create project.
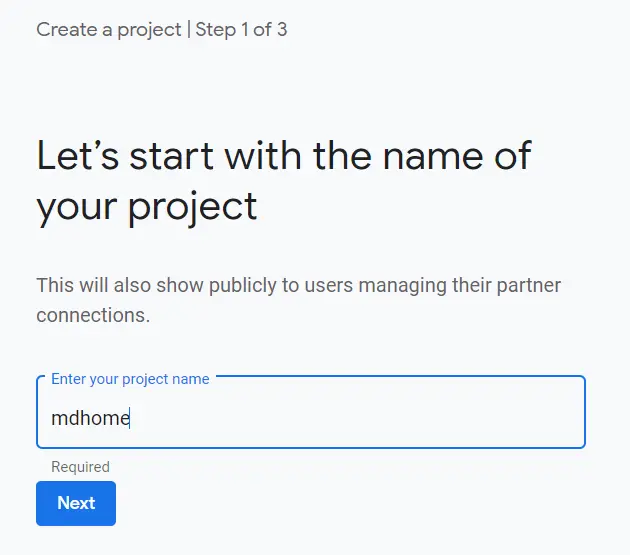
- Give your project a name.
- Google will ask you for an OAuth client ID, I recommend that you create this first before continuing. To create an OAuth client id follow the next steps. Or skip now and create an OAuth client ID later.
- To create an OAuth client ID first visit the Google Developer console (open this in a new tab)
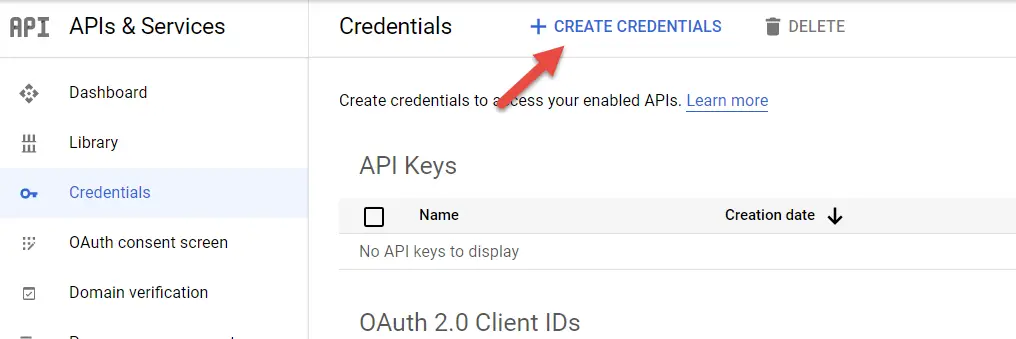
- From the Google Developer Console click on Credentials and click on CREATE CREDENTIALS
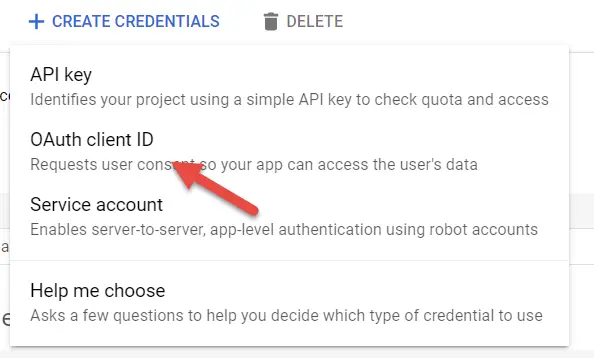
- From the drop down list select OAuth Client ID.
- Pick a name for your credential, and make sure you set the Redirect URL. This redirect URL needs to be externally accessible. I recommend that you use Nabu Casa (Home Assistant Cloud) for this. Your URL should be in the following format:
https://<some id>.ui.nabu.casa/auth/external/callback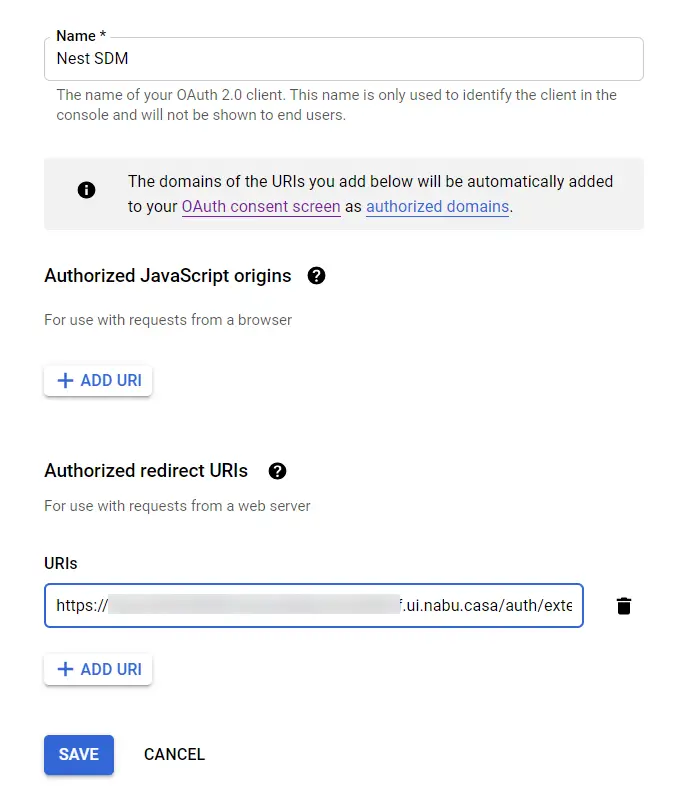
You can also use your own URL, as long as it is reachable from the outside. - You should now be presented with an OAuth client created message. Take note of the
OAuth Client IDandOAuth Client Secret. We need both later for our configuration.
- Now head back to your Google Device Registration screen, and enter the OAuth Client ID.
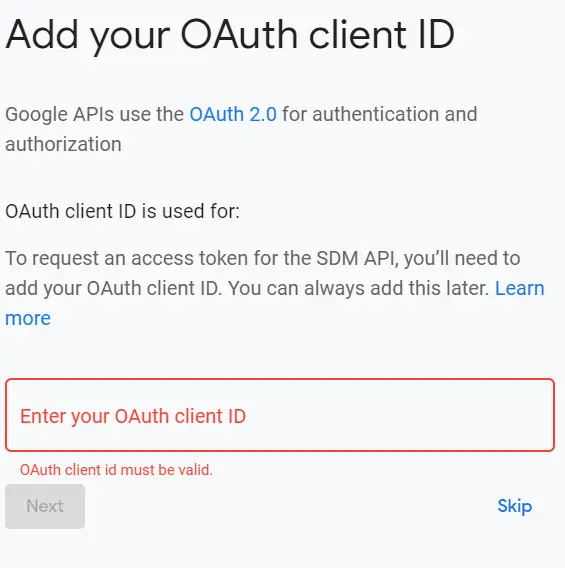
Click Next. - Next make sure you enable Events, by click on Enable.

- You are done, take note of the
Project ID.
If you followed along you should have the following information:
– Project ID
– OAtuh Client ID
– OAuth Client Secret
These are three of the four configuration parameters that are required for the new Nest Integration. Next up we need to create a Pub/Sub subscriber to follow the SDM API Event. Follow the steps for this in the next paragraph.
Create a Pub/Sub subcriber for SDM
We already enabled Events previously. Now we need to enable the Pub/Sub API and create a Pub/Sub subscription. To do this follow the steps below:
- Enable the Cloud Pub/Sub API using this link. This is easy just click on Enable.
- From the Google Cloud Platform console we are going to create a Pub/Sub subscription. Here is a direct link.
- Now within the Google Cloud Platform console, click on CREATE SUBSCRIPTION.
- Enter the following settings:
– Subscription ID: I used the same name as my project.
– Subscription topic: select enter manually and enter the topic from the Device Access Registration console. You can get the topic by going into the project and copy the Pub/Sub topic. As shown below.
– Select Pull as a subscription type.
– Leave the rest default and click on CREATE.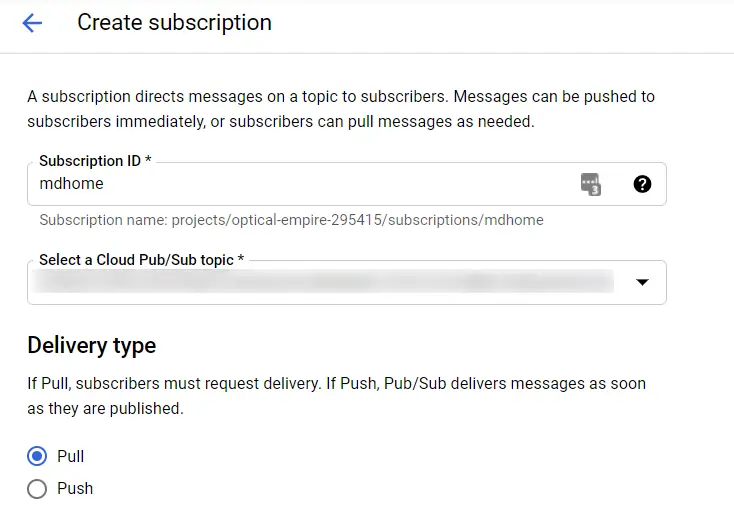
- Once created take note of the
Subscription name. We need this for our configuration.
At the end of these steps you should have the subscription name which is the subscriber_id in the configuration of the Nest integration. This name should be in the format: projects/…/subscriptions/SUBSCRIBER_ID Go back if you do not have this ID.
Nest integration configuration
We can now configure the Nest integration using configuration.yaml. Enter the following configuration details using the configuration parameters that we noted earlier:
nest:
  client_id: CLIENT_ID
  client_secret: CLIENT_SECRET
  project_id: PROJECT_ID
  subscriber_id: projects/.../subscriptions/SUBSCRIBER_ID
Run a configuration check, and restart Home Assistant.
Now you can add our Google Nest devices by following the steps below:
- First, and this is really important. Make sure you do the configuration from your external URL. For example I use the Nabu Casa remote UI URL https://<id>.ui.nabu.casa/. This is very important, otherwise you will get a 400 invalid request error.
- From the Home Assistant UI navigate to Configuration then Integrations. Under Add integration (bottom right) locate Nest.
- You should now be pointed to a Google login page. Login here.
- Next you will be prompted with the following screen:
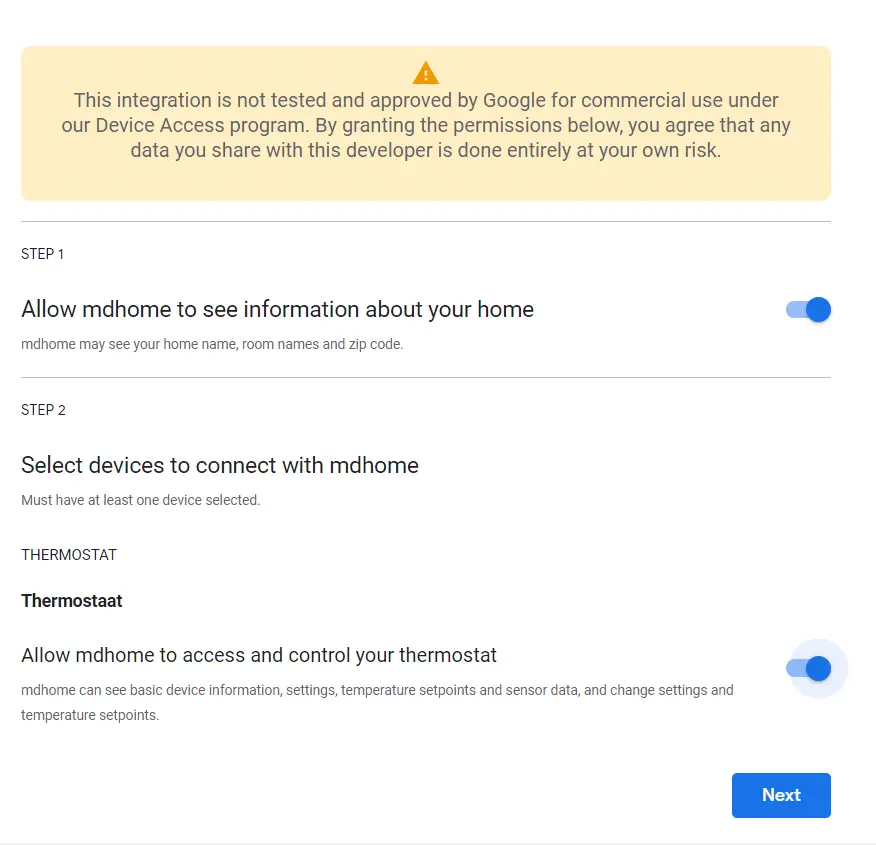
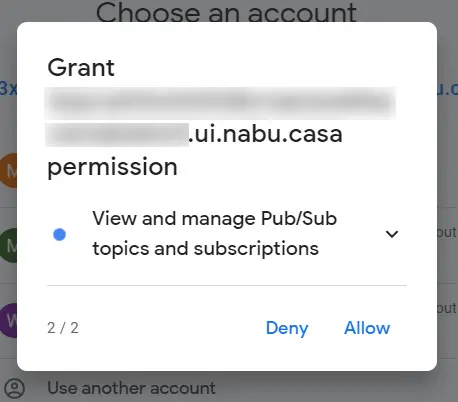
It is ok if you see that the integration is not tested and approved by Google. Click on Next. - Next you will see two more screens asking for permission. Allow those permissions.
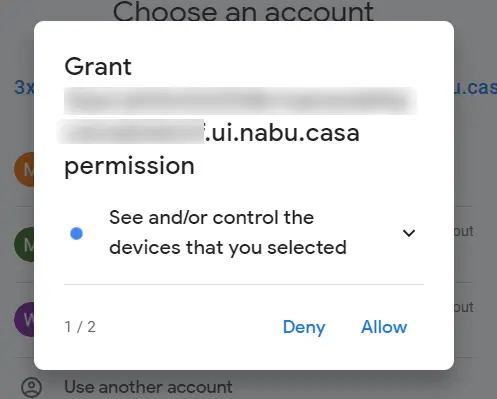
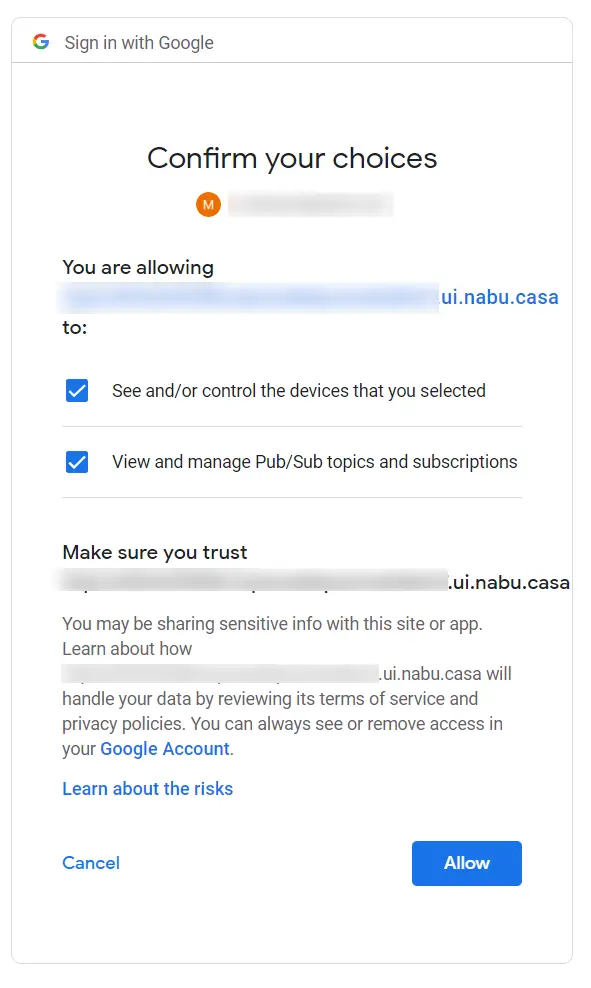
- Next up you will see a confirmation screen. Confirm permanent access to your Google Nest devices.
If all went well, your Nest integration is ready!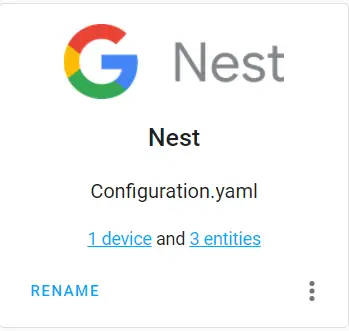
Common errors
During the setup of this integration I ran into several errors myself. I have listed the most common errors as I have seen them on the Home Assistant community. If you run into different errors please let me know, I will update the guide accordingly.
Error 400: invalid_request / authorization error
This error is seen during authorization of the integration. This is due to the fact that you are not connecting from the external URL. Make sure you connect on your external URL and not the internal URL. Here is an example of this error message (in dutch):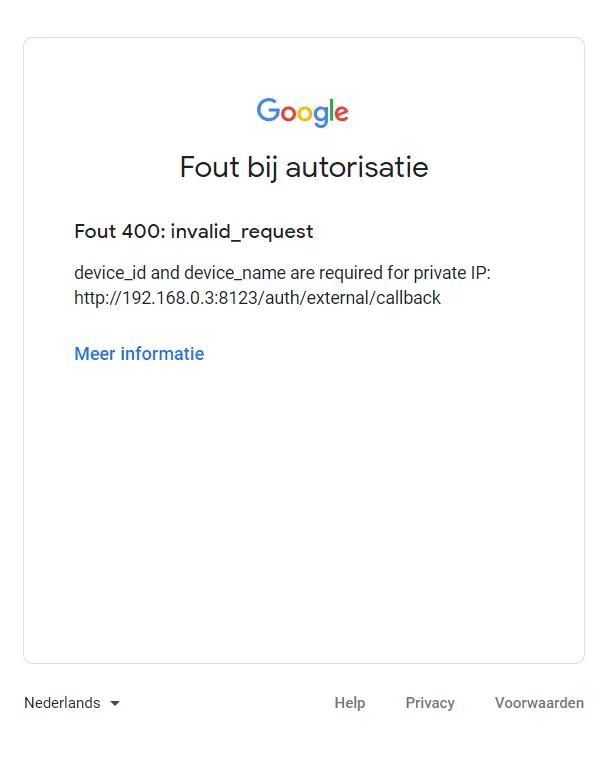
Optional: configure access to the Smart Device Management API
Some users have reported that access to the Smart Device Management API is not always given automatically. Usually when this happens you will see log items like this in the Home Assistant log:aiohttp.client_exceptions.ClientResponseError: 403, message='Forbidden', url=URL('https://smartdevicemanageme…[my project_id]/structures')
You need to follow a few steps to fix this:
- Go the Google API management page.
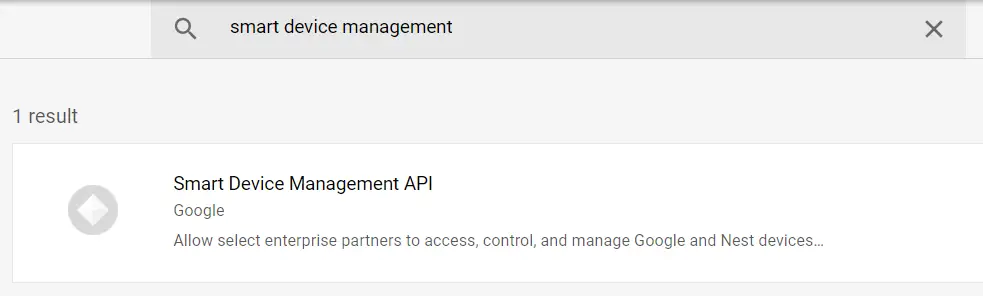
- Click on Enable API and services
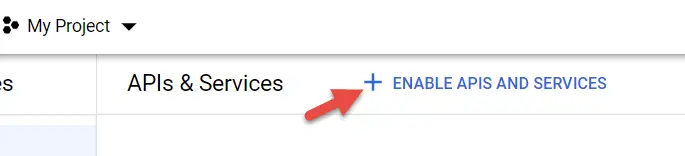
- Search for Smart Device Management. And enable the API.
It will take some time for the integration to pick this change up. Alternatively you can restart Home Assistant.
Data not updating
Something else I ran into was the data not updating in Home Assistant. This is due to a bad subscription ID in the configuration. Make sure you copy the entire subscription name in the format projects/..../suubscriptions/subscription-id
You can easily check if the subscription is updating by looking at the unacked message count from the Google Cloud Platform console.
This is what the unacked message count should look like. If you see a high number here, please go through the steps once again.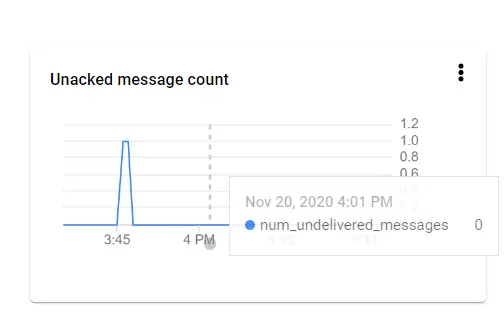
Conclusion and wrap-up
In this article we took a look at the new Google Nest integration for Home Assistant. It is great to finally have a good working and official integration back into Home Assistant. The setup of the integration is quite difficult and I hope this guide helps you to set this up.
Unfortunately Google does not provide access to Nest protect devices yet, but lets hope that they will offer this through the same API in the future. Right now I am very happy to have full Nest integration of my thermostat back into my Home Assistant setup.
47 thoughts on “Using Home Assistant SDM Nest Integration”
Comments are closed.
Recent Posts
The time is finally come! Samsung have released their Galaxy Watch 4 series of watches. It features Google Wear OS 3. and it comes in two models, being the standard model and the watch 4 classic. In...
Microsoft 365 Defender cross check with on-premises Active Directory
Recently I was reviewing the new Microsoft 365 Defender portal and I noticed that a few endpoints were missing from the device inventory. This got me thinking that it would be great if I could...
Thank you for this. Really helpful!
The only thing I was missing is that I needed to enable the “Smart Device Management API” to get it to work.
From https://developers.google.com/nest/device-access/get-started
https://uploads.disquscdn.com/images/9c7340f6c6f8f09ddca21c03dd565d7d2874491b73935cb60daf93ab908aef59.png
Then
https://uploads.disquscdn.com/images/cfd5b20edacf544d0491ca944bacdc9ed8e9894937b72f760a29621847e48d27.png
Thanks for the heads up. This is great feedback, I will make sure I add this to the article.
This is really helpful, however running into an annoying problem. When adding the integration I select the appropriate Google account and then an extremely unhelpful error message is displayed “Something went wrong
Please contact the developer of this app if the issue persists.” Guess I’ve got some debugging to do…
Well I don’t know what changed, just tried calling the API via the curl instructions in the Device Access guide and after running those I was able to add the integration. Thanks for this excellent guide!
I did the configuration, rebooted and added the integration. It stays empty, no entities in there. The logs says this:
Error while setting up nest platform for climate
[..long stacktrace here..]
aiohttp.client_exceptions.ClientResponseError: 403, message=’Forbidden’, url=URL(‘https://smartdevicemanagement.googleapis.com/v1/enterprises/[my project_id]/structures’)
Any clue how to debug this? I removed and added all configuration 3 times
Can you check if you have the Smart Device Management API enabled?
You can check it here: https://console.developers.google.com/
You can enable it using the + sign that states: Enable API and Services
Thats it, thanks! Now I also see its in the other comment. I feel stupid.
Glad it works for you! I will update the blog ASAP with this information.
This fixed it for me too! Thanks for taking the time to write this up.
FYI – Your NC ID is not hidden in the detail text 4 images up.
Thanks, fixed it.
Thanks so much – worked great. I don’t use Nabu Casa, so had to be sure to add internal_url and external_url to configuration.yaml in order for OAuth consent flow to work.
Thanks for this guide. I followed everything, but I seem to be the only one who isn’t getting any events. In the Google Cloud Console, I do NOT see any unacked messages and the Unacked message count is not going up. I followed the instructions exactly. Does anyone know what could be wrong?
Are you sure nothing Is received? Sometimes it can take a while. Temperature updates for example are not very frequent.
Did you enable debug logging? Anything interesting in the logs?
Hey, thanks – for some reason it’s working now. I can see messages in the console: https://uploads.disquscdn.com/images/f3a311befc75dc09643a578340c92d5cfa507f178599296b4a14b98e099f1e37.png
However, in Home Assistant I don’t see these messages come in? I would like to automate things when a camera has a motion event, or my Nest Hello doorbell has a chime event: “sdm.devices.traits.DoorbellChime”. Do you know how to register these entities?
I enabled logging, and my home-assistant.log is full of
[homeassistant.components.stream.worker] Error opening streamas well as these when notifications come in apparently:2020-11-27 12:30:49 DEBUG (Thread-ConsumeBidirectionalStream) [google.cloud.pubsub_v1.subscriber._protocol.streaming_pull_manager] Exception while sending unary RPC. This is typically non-fatal as stream requests are best-effort.and"Request had invalid authentication credentials. Expected OAuth 2 access token, login cookie or other valid authentication credential. See https://developers.google.com/identity/sign-in/web/devconsole-project."Looks like an oauth issue. Make sure to check those steps. I only have nest protect and a thermostat so I cannot help you with the doorbell.
Thanks, messages seem to come in now and I can see them in the logs. Can you tell me how to act on these messages? For example when you receive a thermostat message, do something with it? Like change the color of a light?
You can just use regular automations for that, for example:
https://uploads.disquscdn.com/images/d70fa329ab40c41960ab74b7bdc8295135bfdfe232db70b11eb085267108d501.png
Nah, that’s just acting on the temperature. Cameras and doorbells send events, such as sound: “sdm.devices.events.CameraSound.Sound” or “sdm.devices.traits.DoorbellChime” . I see these in home-assistant.log like this:
2020-11-30 10:14:59 DEBUG (ThreadPoolExecutor-ThreadScheduler_0) [google_nest_sdm.device] Processing update 20d45dcc-fdc3-49c5-af65-3191c0fde42f @ 2020-11-30 09:14:56.751000+00:002020-11-30 10:14:59 DEBUG (ThreadPoolExecutor-ThreadScheduler_0) [google_nest_sdm.device] Event Update dict_keys(['sdm.devices.events.CameraSound.Sound'])
2020-11-30 10:14:59 DEBUG (ThreadPoolExecutor-ThreadScheduler_0) [homeassistant.components.nest] Update 20d45dcc-fdc3-49c5-af65-3191c0fde42f @ 2020-11-30 09:14:56.751000+00:00
2020-11-30 10:14:59 DEBUG (ThreadPoolExecutor-ThreadScheduler_0) [homeassistant.components.nest] Event Update dict_keys(['sdm.devices.events.CameraSound.Sound'])
Do you know how to trigger on that?
Aren’t these mapped to any entities?
Sorry no camera here so I cannot check this. If it is not mapped to an entity you might need to ask the developer of the integration.
You won’t believe this commit message I just saw: https://uploads.disquscdn.com/images/937d65e451514e4d831ee8760b1c047230e8ba993e34fd6a38684589cf67dd01.png
Thanks for all your help Maarten, looks like I’ll manage now. Only thing is when I cast a nest stream to my chromecast, it stops after about 5 minutes with a spinning circle – but I don’t think you can help me with that either.
Can you say, why i see only my nest doorbell camera not anything to trigger a automation when the bell is pushed…..then…..
https://uploads.disquscdn.com/images/616cf0449d511d9d21d46597c3f67d28ef03dafc55aac81d40511ae68a0774a5.jpg
This blog helped us a lot! However, we ran into the issue that we got a 403: access_denied
The developer hasn’t given you access to this app
The key was pushing/publishing your app to production instead of testing in the google cloud platform -> oauth concent screen
I have the same. How can i solve it?
the app is now set to “testing” in the google cloud platform and there’s a button to promote the app to production which solved this for me.
I have found what I did wrong. I didn’t add an approved user (Google account) for it. So when I try to login I got a 403 (offline). After I added a Google account user everything worked fine. I didn’t need to promote the app out off testing
Looks great, thanks a lot! But before I can create the oAuth client id, I’m asked to configure the OAuth consent screen with information about the application? What should I put there?
Glad you like it. You can use any project name.
I too had to enable Smart Device Management manually. I now have my primary Thermostat but none of my Nest Temperature Sensors. Any idea how to get them to work?
I don’t the seperate sensor is supported yet. I cannot verify myself because I don’t own one.
Thanks for the post. I spent a good 4 hours on this and finally got it. Couple thing I found to be my issue.
1. I needed to setup duckdns.org so that I could access the server publicly for Google’s oauth redirect to work
2. Restarted the server after configuring the yaml config
3. Updating the internal and external URLs:
Go to Configuration -> General.
On this page, two fields that can resolve this issue: “External URL” and “Internal URL”.
Internal URL: The URL you type in your browser when you are at home, connected to your home network, e.g., http://homeassistant.local:8123
External URL: The URL you type in your browser when you are not home, connected to your home network, e.g., https://example.duckdns.org
Glad I stuck with it, learned a lot. Also I just spun up HA for the first time 8 hours ago this morning
Hi, I have a strange problem. I configured everything and finally got everything working, but overnight all the updates stopped and I’m not sure where to look to figure out what’s wrong. All the devices now say “unavailable” and I’m seeing unacknowledged messages. Any thoughts on where I can look to debug? This blog was critical in my being able to configure this, and it looks to be incredibly useful to me if I can get it working.
Nice guide! I acces via my external URL, but i still get the 400 error:
Fout 400: redirect_uri_mismatch
The redirect URI in the request, https://xxxx.duckdns.org/auth/external/callback, does not match the ones authorized for the OAuth client. To update the authorized redirect URIs, visit: https://console.developers.google.com/apis/credentials/oauthclient/${your_client_id}?project=${your_project_number}
I double checked, but my redirect URL is set right.
When i try to reach the callback URL myself i do get the error: Missing code or state parameter in http://xxxx.duckdns.org/auth/external/callback
Did i miss a step in the guide to activate this callback URL or what?
Brilliant guide. Rate this way higher than the documentation on Homeassistant.
Here’s my issue: I have 2 nest thermostats under the same account (Upstairs & Downstairs). However, using your guide, only one appears (Upstairs) despite giving the permissions on both. I’ve tried doing an integration where I only give permission on the Downstairs Nest Thermostat, however no entity is found under said integration.
Any advice on this? Relatively new to Homeassistant/coding so excuse the newb like problem.
I also have 2 thermostats. Both were working. Then one disappeared a month later from HA after making no changes. Removed integration and re-added – only finds the one thermostat. Sounds like we have the same problem..
Cheers on the notification! They must have updated something behind the scene . This time, just deleting the integration and reconnecting did the trick (it didn’t last time).
Have since found that rebooting the thermostat fixes the problem for a number of people. Even though the Thermostat works and the native Nest app works, something requires a thermostat reboot to correct broken access sometimes.
Fixed. Restarted thermostat at the thermostat, removed Integration in HA, Added Integration back.
Thank you for a working manual! I initially selected only few devices to expose to Hass and now I want to integrate other Nest devices. Is there a way to do so via some config update? I assumed I might need to remove Nest integration and create it again to choose more devices, but that looks like not a future proof approach. Doing so when adding a new Nest device sounds like a hassle. Please help if there is a better way. Thank you!
Chiming in to say thanks. I kept stumbling over setting up the subscription topic manually. After wiping all the hoop jumping out for the fourth time it finally worked perfectly.
Quick question: Does this have to be done with the primary Google Account that owns the Nest / Google Home, or can this be done with a Google account of any member of the home (who has access to all home devices via the Google Home app)?
It’s worth pointing out that exposing HA externally is only needed for the brief amount of time that one adds the Nest integration into HA. Afterwards, one can seemingly restrict external accessibility again (for the sake of security).
Hi. thanks for these instructions. Any idea what might be causing the below in the logs? I’m trying to install the nest intergration and nothing happens when i get to the step to click on it. Thanks for your time.
File “G:DownloadzHassWP_2021.1.1python-3.8.7libsite-packagespkg_resources__init__.py”, line 770, in resolve
raise DistributionNotFound(req, requirers)
pkg_resources.DistributionNotFound: The ‘google-cloud-pubsub’ distribution was not found and is required by the application
Is there any way to get the nest camera person detected to only trigger an automation based upon the zones setup in the nest app? I’ve got an outdoor camera and also the doorbell and have set activity zones for notifications which seems to work ok (as I don’t want a notification unless they’re on our driveway) but the automation in home assist seems to be getting triggered every time they detect a person regardless of where they are.
redirect_uri_mismatch issue fix.
When starting from my external URL https://XXX.ui.nabu.casa/ and adding the nest integration it passes ‘redirect_uri=https://my.home-assistant.io/redirect/oauth’ as the redirect URI so I added that in step 10 in addition to https://XXX.ui.nabu.casa/auth/external/callback(not sure if this is needed). It works now, though is this s security issue https://my.home-assistant.io/redirect/oauth will get an access code? THANKS!