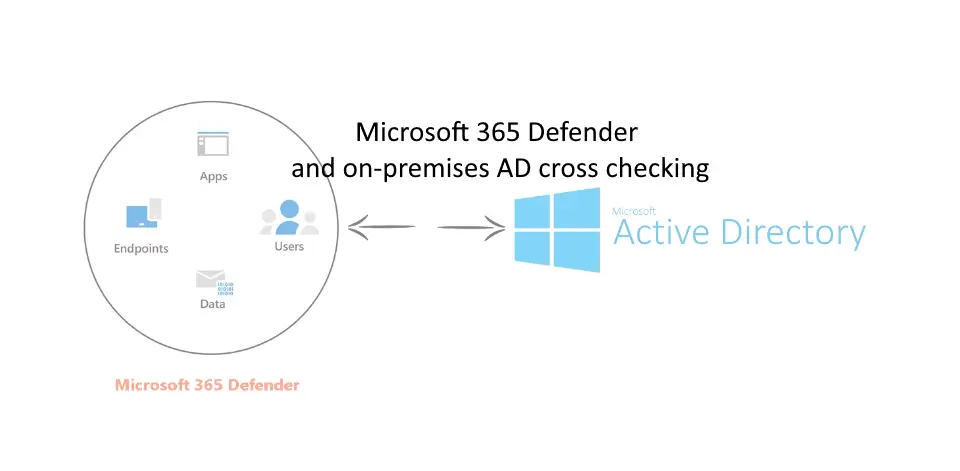
Recently I was reviewing the new Microsoft 365 Defender portal and I noticed that a few endpoints were missing from the device inventory. This got me thinking that it would be great if I could somehow cross check our on-premises Active Directory devices with the inventory in Microsoft 365 Defender. Because to improve the visibility on your network, visibility is a big deal.
Luckily there is an excellent PowerShell Active Directory, and Defender provides us with some great API’s that we can leverage using PowerShell as well. In this blog post I will show you a couple of ways to make sure our on-premises servers are always covered and visible within the Microsoft 365 Defender inventory.
Getting access to the Defender for Endpoint API (using app registration)
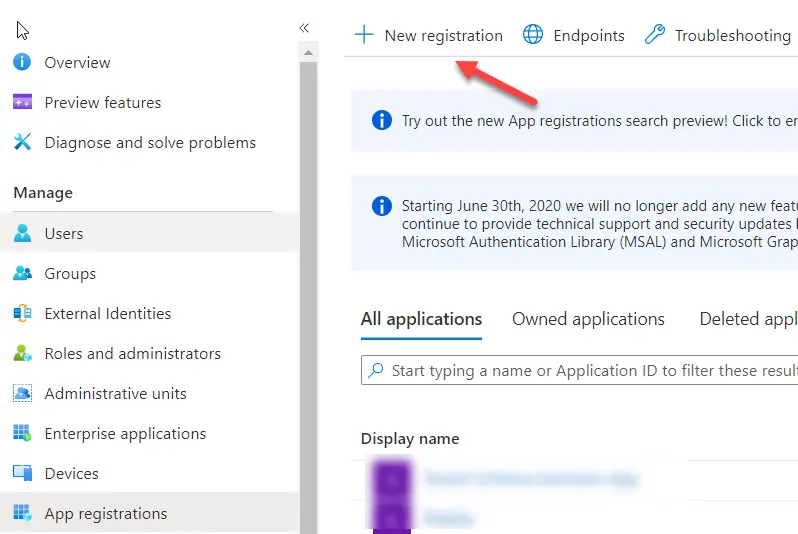
Before we can access the Defender for Endpoint API we first need to set-up a new App registration. You can set-up a new App registration from the Azure Active Directory portal. I will provide you with a couple of steps in order to run the PowerShell scripts we create later to do the actual cross checking.
- Create a new registration by going to App registrations and click on “New registration”
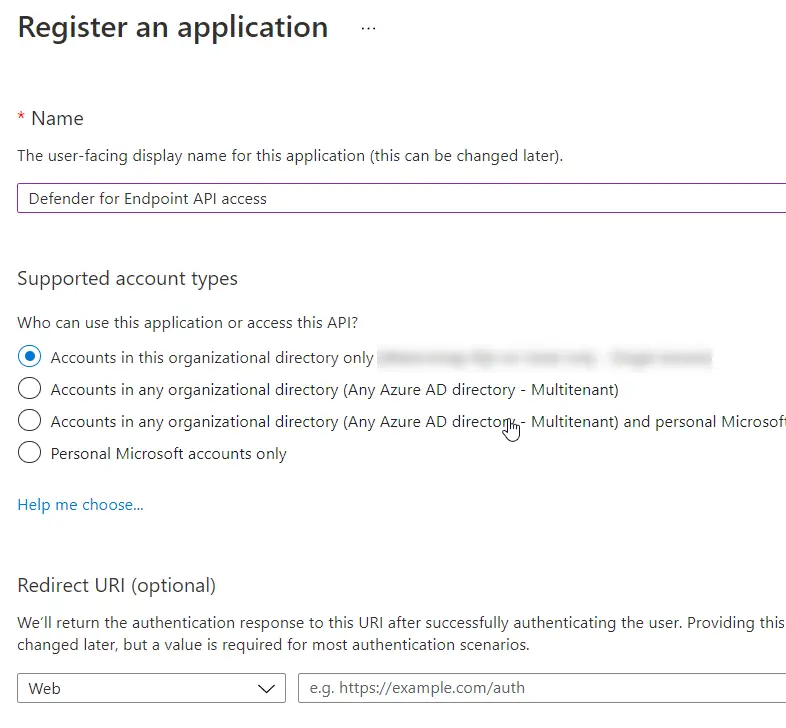
2. In the Register an application page. Choose a meaingful name and select the default supported account type. Which is Accounts in this organizational directory only. You can skip the Redirect URI and next you can click on Register.
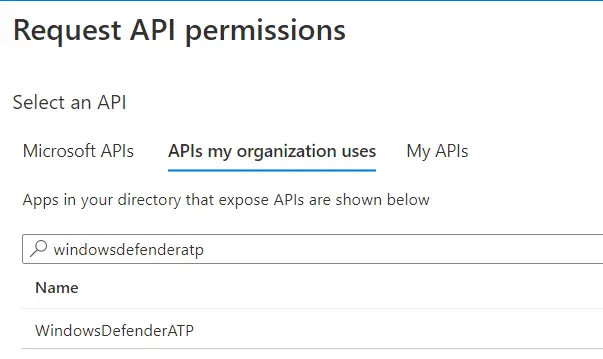
3. On the application page, we need to give some API permissions. Do this by clicking on API permissions. And click on Add a permission.

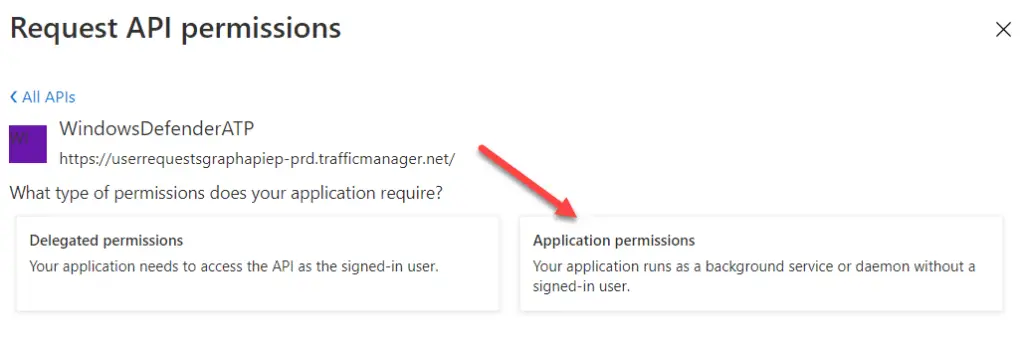
4. Now this is a bit tricky, from the APIs my organization uses search for WindowsDefnderATP as shown in the screenshot below.
5. Click on WindowsDefenderATP and choose Application permissions.
6. Because we are going to query multiple machines, we will use the “Machine.Read.All” permission. You can either search this or go to Machine and expand it manually:
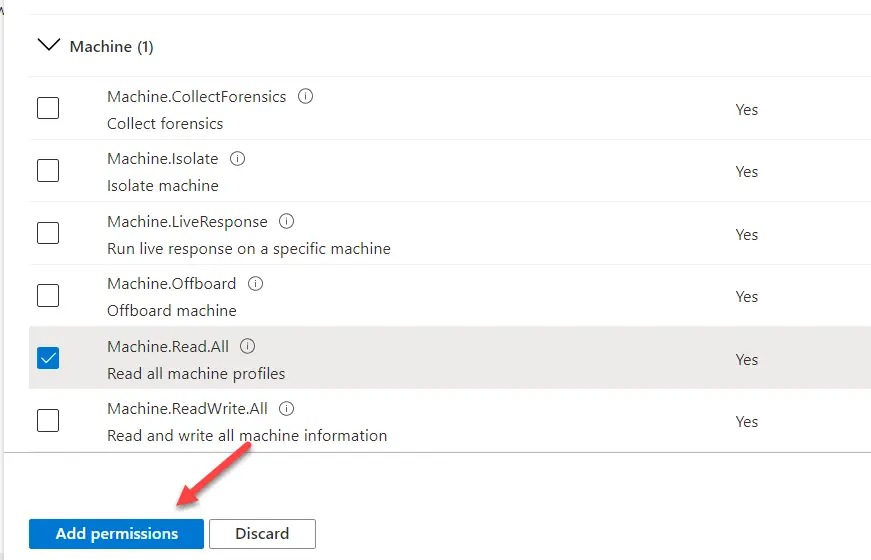
Once you selected the permission click on on Add permission to add it.
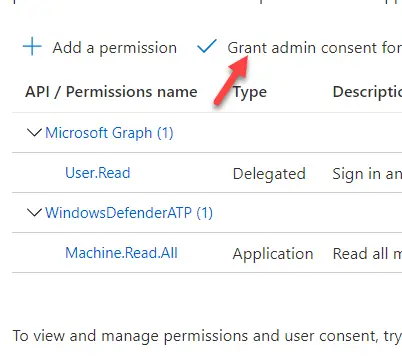
7. One last important step for the registration is the Grant admin consent. In step 6 we have added the permissions but these are only applied after you grant admin consent. To do so just click the button “Grant admin consent for <company name>”
Create client secret
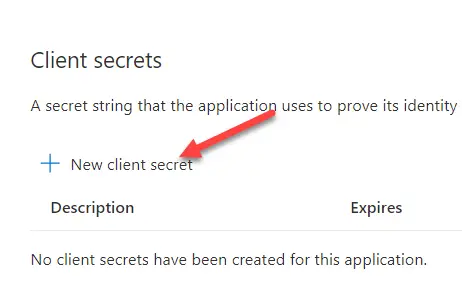
Now that we have the application and API permissions sorted, we need to create a Client secret so we can access the API from our PowerShell script. Creating a client secret can be done from the Certificates & secrets sub menu from the App registration. In a few simple steps we can create our client secret.
- Click on the New client secret button.
2. Next enter a description and expire date for the new secret. I set mine to the following parameters: Feel free to change the expiration date though.
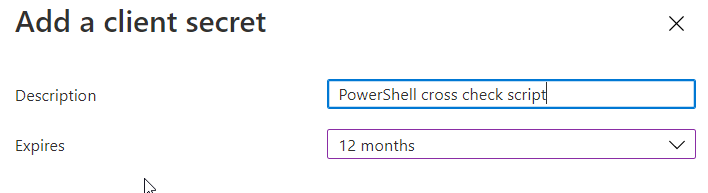
Click on Add to add the new secret.
3. Take note of the secret value and secret id:

We are now done creating the client secrets. Now let’s have a look at some scripts to cross check our on-premises Active Directory with the Defender for Endpoint inventory.
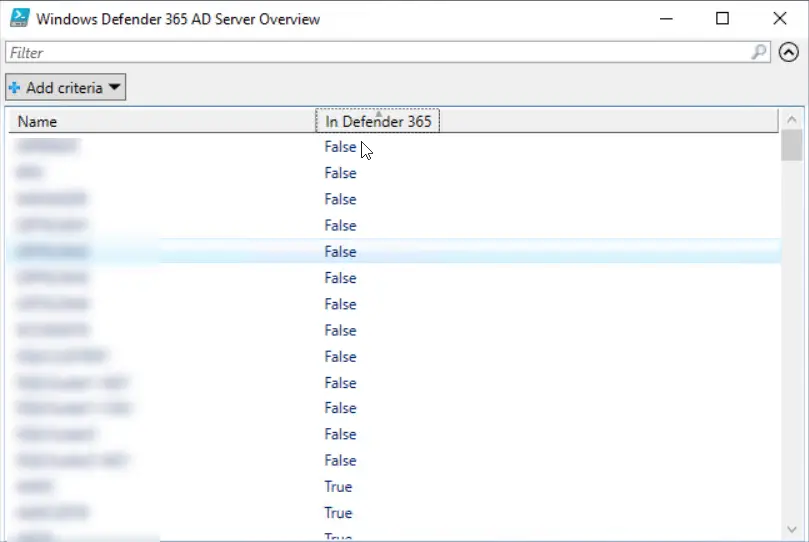
Interactive cross check
The first script I wrote is an interactive script that will output a Gridview in which you can review both on-premises and online inventory. An example output of the script is listed below:
To use this script you need just one prerequisite for PowerShell and that is the ActiveDirectory PowerShell module. The way you need to install the module depends on the operating system you use. Check out Microsoft’s documentation for more information.
Furthermore we need to make a couple of settings for the script, We need to following parameters:
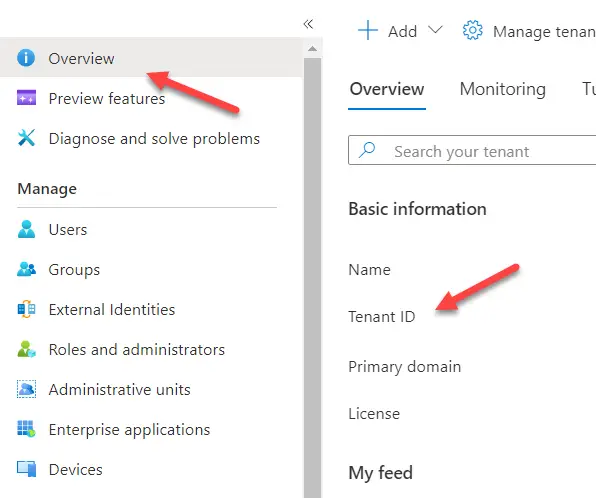
Tenant ID
You can find the tenant ID by going to the Azure AD portal. The tenant ID can be found in the overview page.
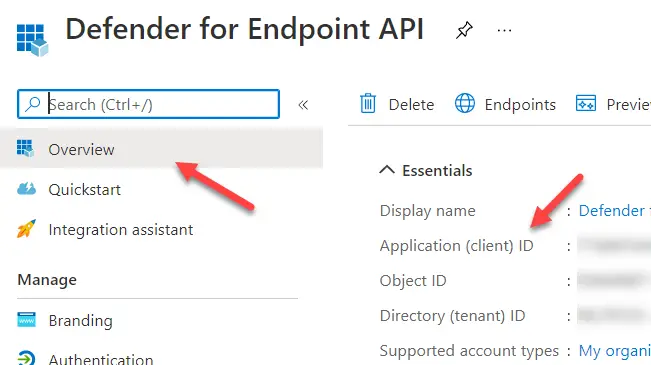
Application ID
The application ID can be found on the app registration we created earlier. It is listed in the overview page of the app registration:
Application secret
The application secret is the secret key we created earlier in the “Create client secret” step of this blog post.
The script
Now that we have all the parameters ready, we can simply paste them in the script listed below. Next we can save the PowerShell script and run it. Feel free to modify this script to suit your needs!
Scheduling cross check
Having the ability to do an interactive cross check is really great. But sometimes you just don’t have the time to do manual cross checking. So I created a PowerShell script that can be scheduled, so you will always be notified when there is a server missing from the Microsoft 365 Defender inventory. Just change the extra parameters in the script and you will get notification by e-mail based on your demand.
There is also a skip list option in this script, this allows you to skip checking certain servers.
Wrap-up
This concludes the blog post on cross checking the Microsoft 365 Defender inventory with you own on-premises Active Directory. As you can see the API is awesome and allows you to create such scripts quite easily with a bit of PowerShell experience. If you have more inspirational ideas on PowerShell scripts using this API please do let me know in the comments down below.
Recent Posts
The time is finally come! Samsung have released their Galaxy Watch 4 series of watches. It features Google Wear OS 3. and it comes in two models, being the standard model and the watch 4 classic. In...
You have probably been using Home Assistant for quite a while, but lately you have wondered how to enable remote access to your Home Assistant installation. This is a very common question and one way...