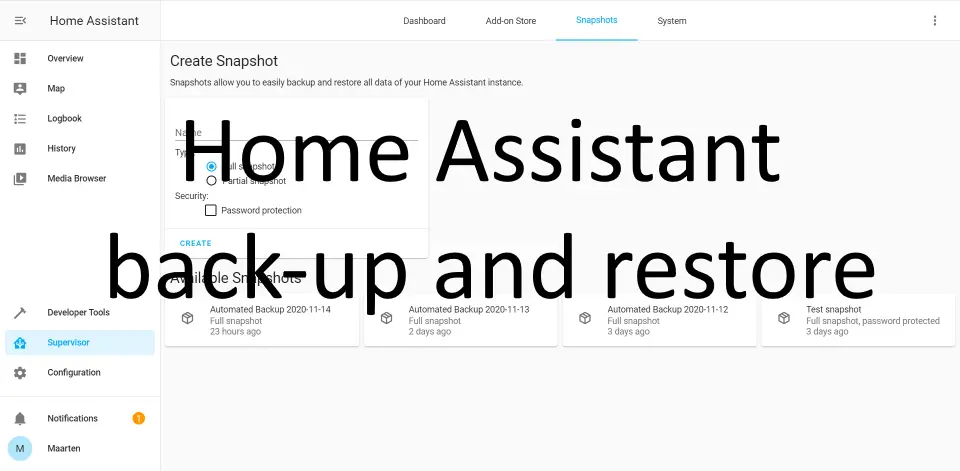
Home Assistant is a great piece of home automation software. Installing and configuring of Home Assistant can take quite a lot of time. And you want to make sure you do everything to protect your precious and good working configuration. Therefore it is recommended to take a regular back-up of your Home Assistant installation. In this article I will look at the different methods on how to back-up Home Assistant.
Making a back-up is great, but a back-up is only as good as its restore. So we need to make sure we can also restore the back-up we created. We will also look at the different methods of restoring our created back-up. For those of our looking a quick answer it will follow below, but if you need more detail please read through for all of the extensive option of backing up Home Assistant. Here it the quick basic answer to the question how I back-up Home Assistant:
- In Home Assistant go to Supervisor on the left hand side.
- Click on the Snapshots tab.
- Give the Snapshot a name.
- Select either full or partial snapshot.
- Optionally provide a password for the snapshot.
- Click on CREATE to create the snapshot.
- The snapshot is done, now make sure that you put your snapshot away in a secure place.
Back-up methods for Home Assistant installed using supervisor
First we will have a look at the back-up options provided when Home Assistant was installed using the supervisor method. Home Assistant supervisor was formerly known as hass.io. Hass.io is a container based system for managing Home Assistant core installation and related applications.
How to tell if you are using a Home Assistant install using supervisor?
It is very easy to determine whether or not you have a Home Assistant installation that was installed using the supervisor method. You can find this out by using these simple steps:
- Login to Home Assistant using http://homeassistant.local:8123 (optionally replace homeassistant.local with the IP or hostname of your installation)
- On the left hand side of the Home Assistant interface you should see a “Supervisor” option, such as you can see below:
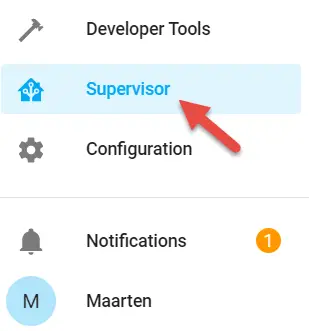
If you are using a Raspberry PI and have used the Home Assistant image for it, you will surely have Supervisor.
Manual back-up method
You are lucky having the supervisor available, as it by far the most easy option to create a reliable back-up from Home Assistant. The back-ups are known as snapshots, and here is how you can create them manually:
- Login to Home Assistant.
- Go the Supervisor (as seen above)
- Click on the Snapshots tab.
- You should see an option to create a snapshot, enter the following parameters:
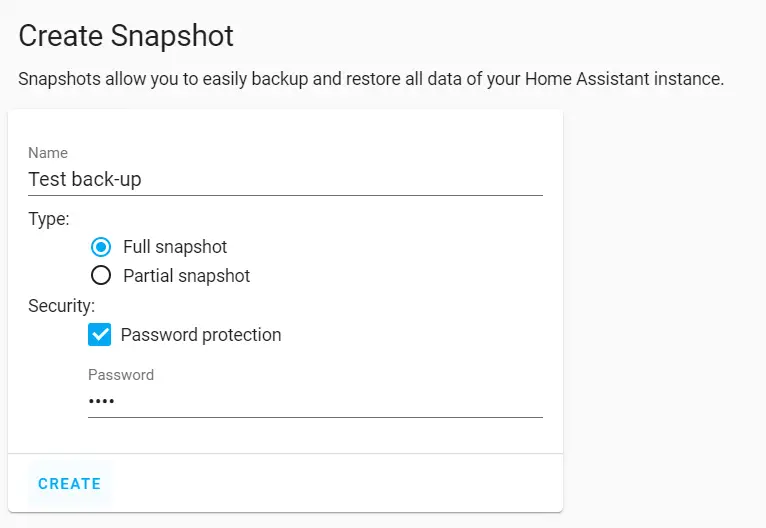
Name – Give the snapshot a good description
Type – you have the choice of two snapshots types here, either a Full Snapshot or a Partial Snapshot. The Full Snapshot option is the one I recommend. This will take all the data from Home Assistant and will back it up. A Partial Snapshot will back-up only the areas that you select you can select the following areas:
– Home Assistant configuration
– SSL
– Share
– Media
– Local add-ons.
Security – You can protect the back-up using a password. I recommend that you always do this, even though it optional. - Now click on CREATE to start the snapshot process.
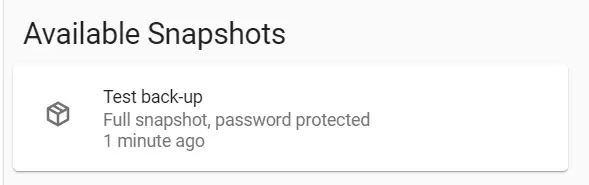
- After a while you should see the snapshot available in a list below:
- You can click on the snapshot to see more information about the snapshot. But there is also an option to download the snapshot.
- Click on DOWNLOAD SNAPSHOT to download the snapshot.
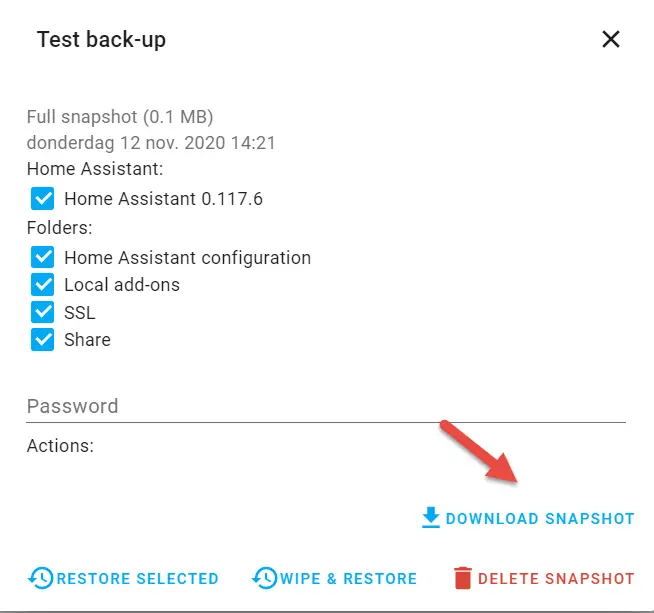
- This will download a tar file with the latest snapshot. I recommend that you store this snapshot away on a secure and if possible remote location such as a Google Drive, OneDrive or Dropbox.
Automating back-ups
If you are lazy like me, you are most likely looking for a way to automate back-ups. We can automate back-ups using Home Assistant built-in automation method. Here are the steps you need to take in order to automate your back-up:
 Go to configuration on the left hand side.
- Click on Automations

- Click on the orange “+” sign that is in the right bottom.
- Click on skip if you get a pop-up asking what your automation should do.
- Now we can enter the details of our automation:
Name – Give the automation a name, I went with “Automatic Snapshot”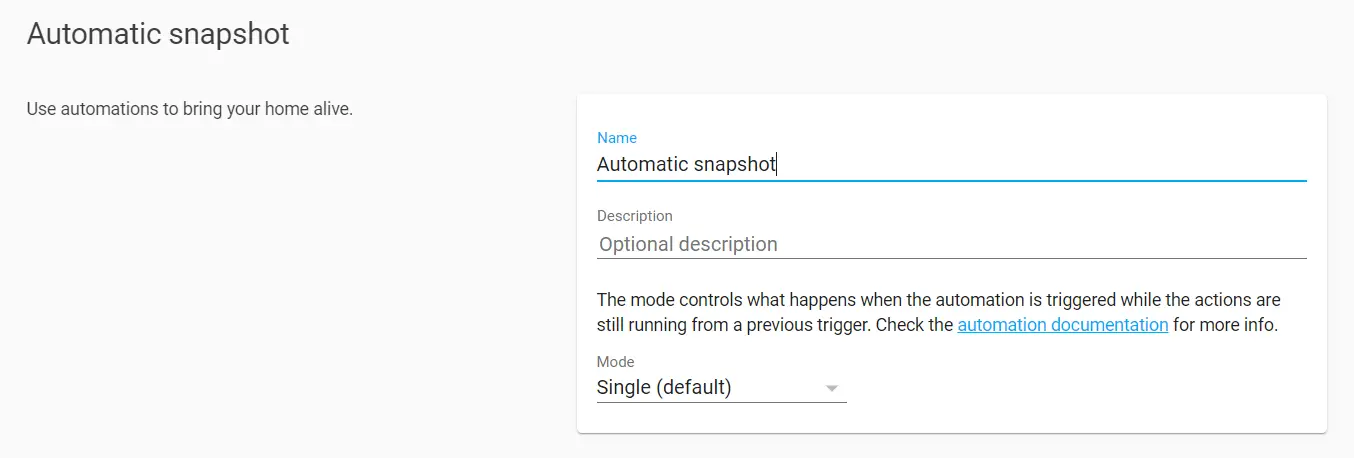
Trigger – Select a trigger, this should be a time trigger. The format for time is HH:MM:SS in Home Assistant.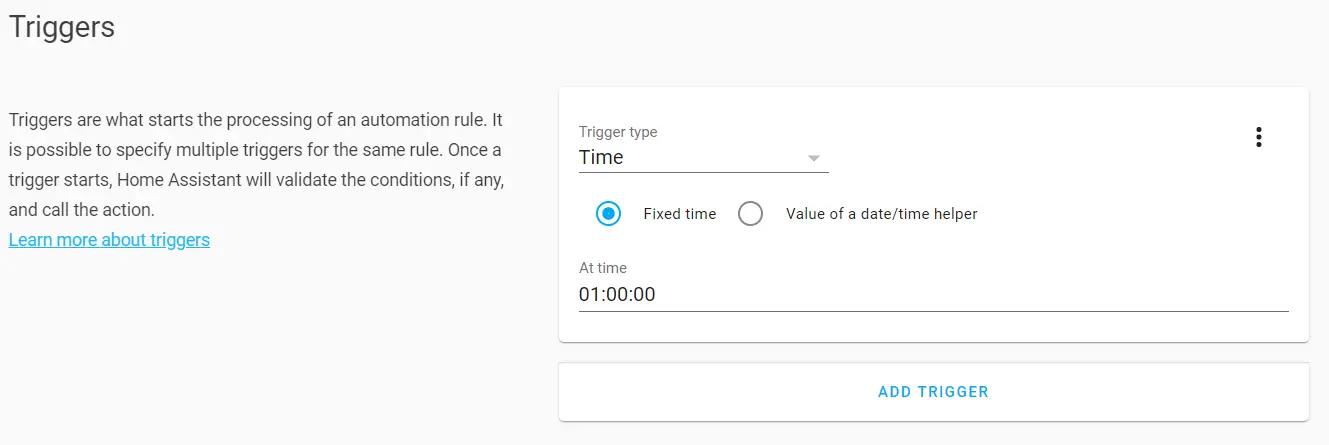
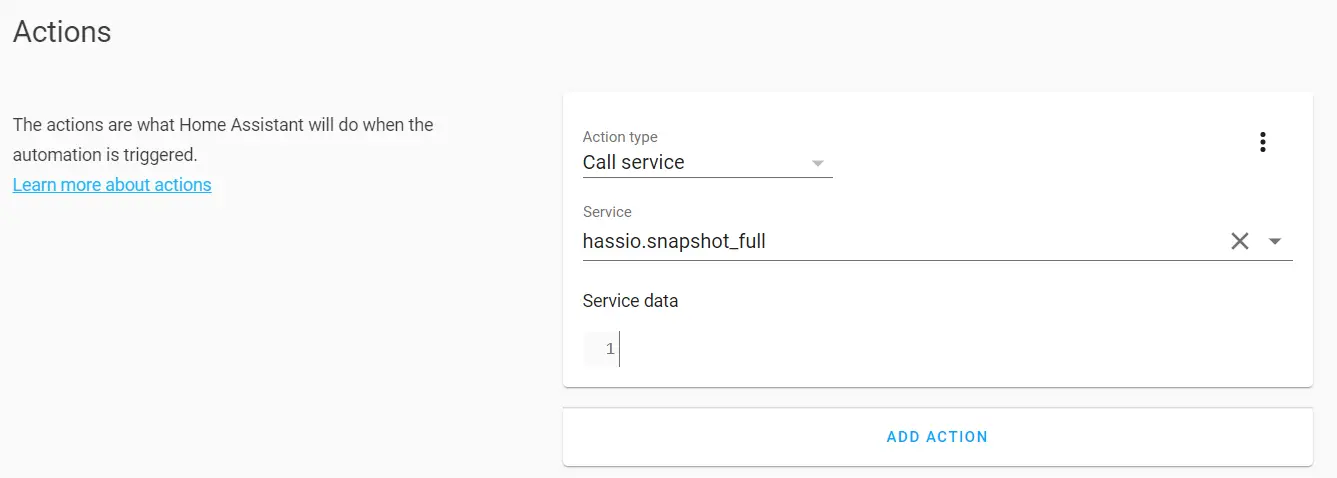
Actions – You need to select Call service here. and then select hassio.snapshot_full or hassio.snapshot_partial.
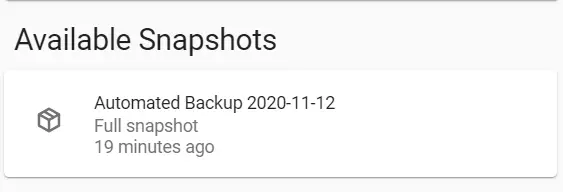
Within the service data pane you can specify parameters such as the addons to back-up or a generated automatic name for the back-up. In this example I have chosen to create an generated name: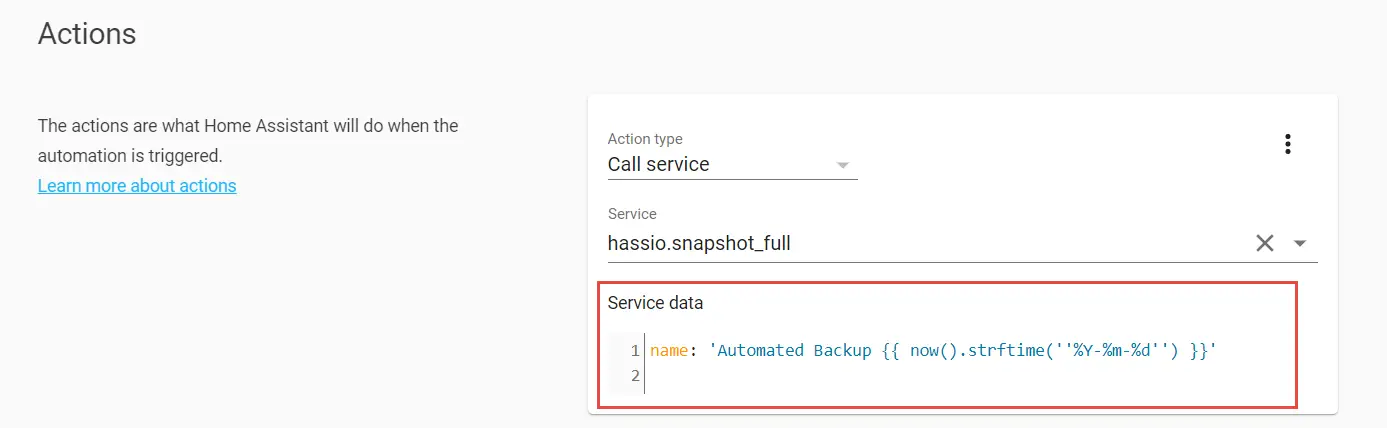
A full list of options that you specify can be found in the Home Assistant community. - You can find the created snapshots in the Supervisor snapshot menu. Just like the instructions above.
- Once again you need to download this file manually and put it in a secure place.
So now we have the back-ups automated, but still this requires some manual action of moving the files around. Wouldn’t it be nice to automatically upload the back-up file to a cloud based storage provider?
I have listed some of the most common cloud providers and ways to upload Home Assistant snapshots to these cloud providers.
Automatic back-up (snapshot) of Home Assistant and sync to Dropbox
The first cloud provider we are going to take a look at is Dropbox. There is an unofficial Dropbox sync add-on for Home Assistant. We need to take a few steps in order to install and activate this add-on. We will build upon the steps described in the previous instructions.
- First we need to add the following add-on store repository:
https://github.com/danielwelch/hassio-addons
You can do this by going to Supervisor and then click on Add-on Store. Find the dots on the upper right corner, and click on it and then click on Repositories:
- Enter the URL specified and click on ADD:
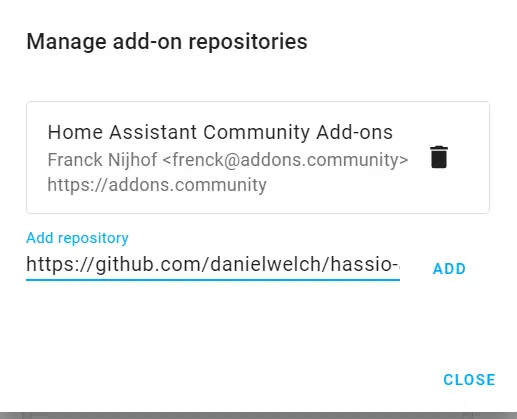
- You should now see the new repository with the Dropbox add-on:
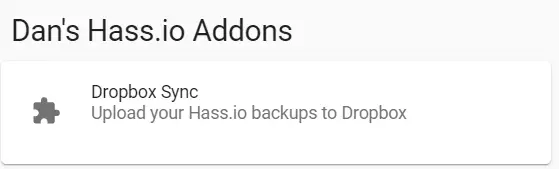
- Click on the add-on and click on INSTALL.
- Once the plug-in is installed we need to configure it properly. First we need a Dropbox oAuth token. We can retrieve this by using the following steps:
1. Go to https://www.dropbox.com/developers/apps
2. Click the Create App button.
3. Follow the prompts to set permissions and choose a unique name for the “App” token. Take note of the oauth token. - An example configuration looks like this:
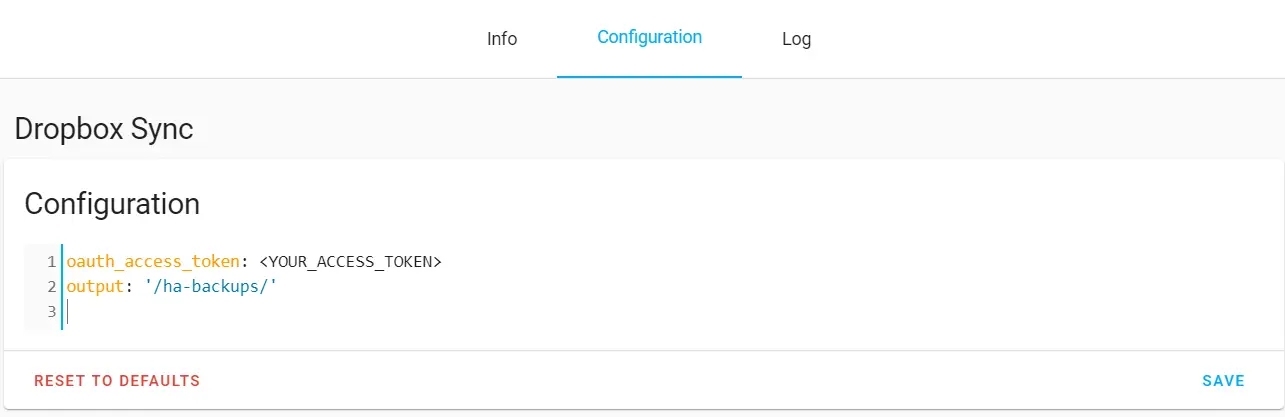
As you can see output specifies the directory to which backups are uploaded, in my case this is the ha-backups folder. - Once we have the configuration all done, we can create an automation for the Dropbox synchronization. The great thing is that we can call this Dropbox sync like a service.
- I have extended my existing routine with the new Dropbox sync service by using another action in the automation:
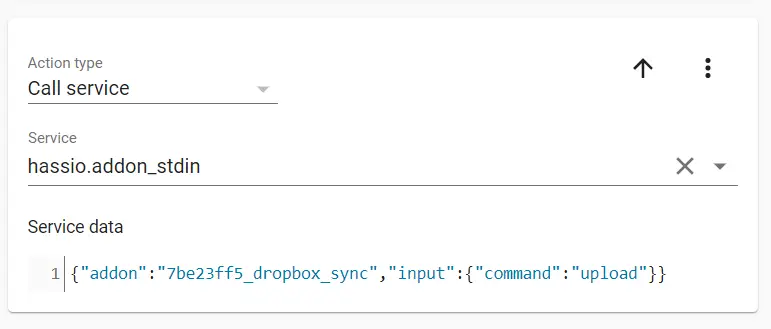
This concludes the steps you need to take to upload your snapshot to Dropbox automatically. This ia great completely automated back-up procedure that sync to an offsite location. This way you are protected against technical disasters but also physical disasters such as fire.
Automatic back-up (snapshot) of Home Assistant and sync to Google Drive
In the former paragraph we had a look at automatic our back-up and sync the back-up to Dropbox. There is also an add-on available for Google Drive. With a few steps we can setup the Google Drive Sync:
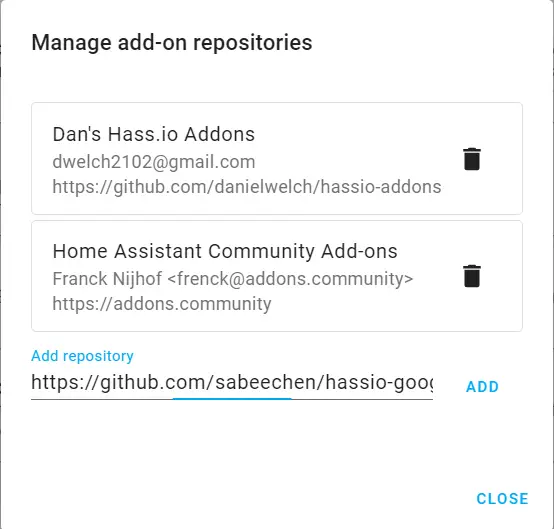
- First we need to add the following add-on store repository:
https://github.com/sabeechen/hassio-google-drive-backup
You can do this by going to Supervisor and then click on Add-on Store. Find the dots on the upper right corner, and click on it and then click on Repositories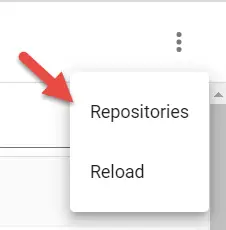
- Enter the URL specified and click on ADD
- Find the new repository and click on it, then click on INSTALL to install the Google Drive add-on.
- After installing click on START to start the add-on. Now give it some time to start up.
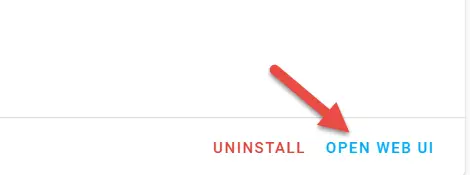
- Once done click on the OPEN WEB UI button. This will take you to the settings page of the Google Drive add-on.
- Follow the Getting started steps of the add-on.
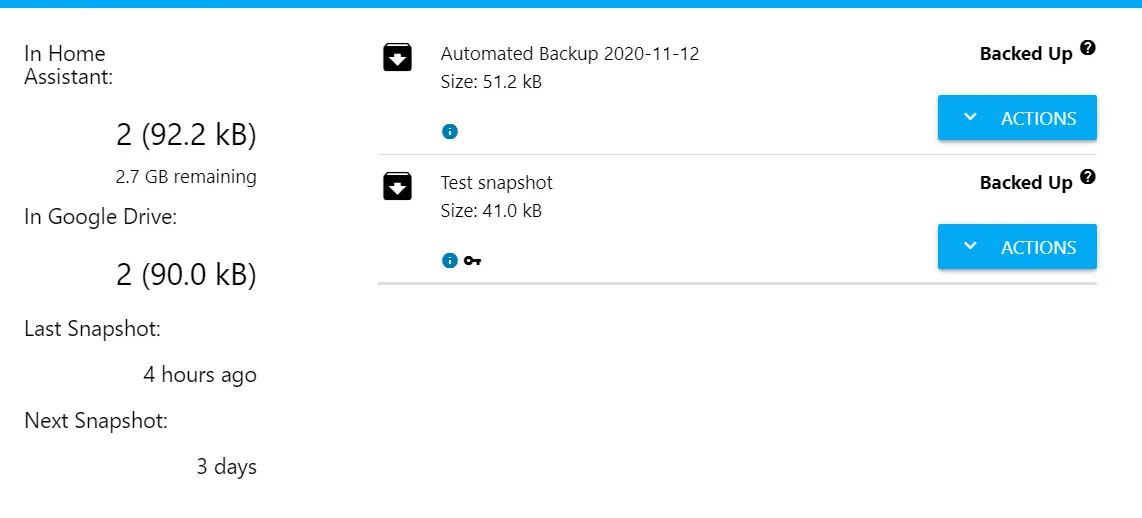
- If all went correct you should see the following page with information about the snapshots. There is no need to adjust the automation we created before. The add-on will take of the synchronization.
There we go, another option to keep your Home Assistant configuration and add-ons safe and sound.
Automatic back-up (snapshot) of Home Assistant and copy using SCP (NAS or Server)
Some of you might not like the idea of a back-up of your Home Assistant configuration in the cloud. So there is another option to securely store your configuration away. That is to copy it to an external location of choice using SCP (Secure Copy Protocol). I have tested this procedure using my Synology NAS.
- First we need to add the following add-on store repository:
https://github.com/ikifar2012/ha-addons
You can do this by going to Supervisor and then click on Add-on Store. Find the dots on the upper right corner, and click on it and then click on Repositories - Enter the URL specified and click on ADD
- Find the new repository and click on the Remote Backup add-on, then click INSTALL:
- Now before we do any configuration we need to make sure that we can login to our remote server by using a SSH key from our Home Assistant machine. We need to take a few steps to accomplish this. Start by enabling SSH on the Home Assistant machine:
– Go to your user profile from the left hand side.
– Now enable the Advanced Mode from the settings:

– With the advanced mode enabled go to Supervisor and then to Add-on store. Now search for the SSH add-on:
– Click the add-on and click on INSTALL. Make sure you enabled the option Show in sidebar. After that start it by clicking on START. - From the sidebar go to the Terminal option.
- Once inside the terminal type ssh-keygen to generate a SSH private/public key pair. Hit enter on all the questions to keep the default locations.
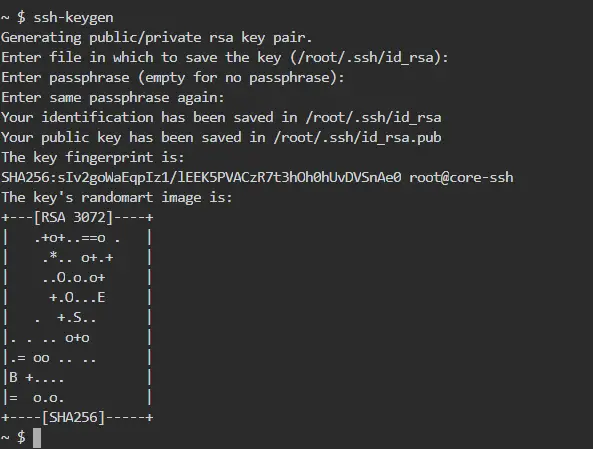
- Now we need to move the public key (id_rsa.pub) to our remote server. I find that the most easy way to do this is by using SCP. Enter the following command:
scp /root/.ssh/id_rsa.pub maarten@host:/home/maarten/
Obviously you need to replace host with your remote host IP here. - On the remote machine we need to add the public key to our authorized_keys file. Login to the remote machine and issue the following command:
cat id_rsa.pub >> .ssh/authorized_keys
This command will add our public key to the list of authorized keys. - Now still in the terminal, copy the private key to the /ssl directory. This is where the add-on will ook for our private key.
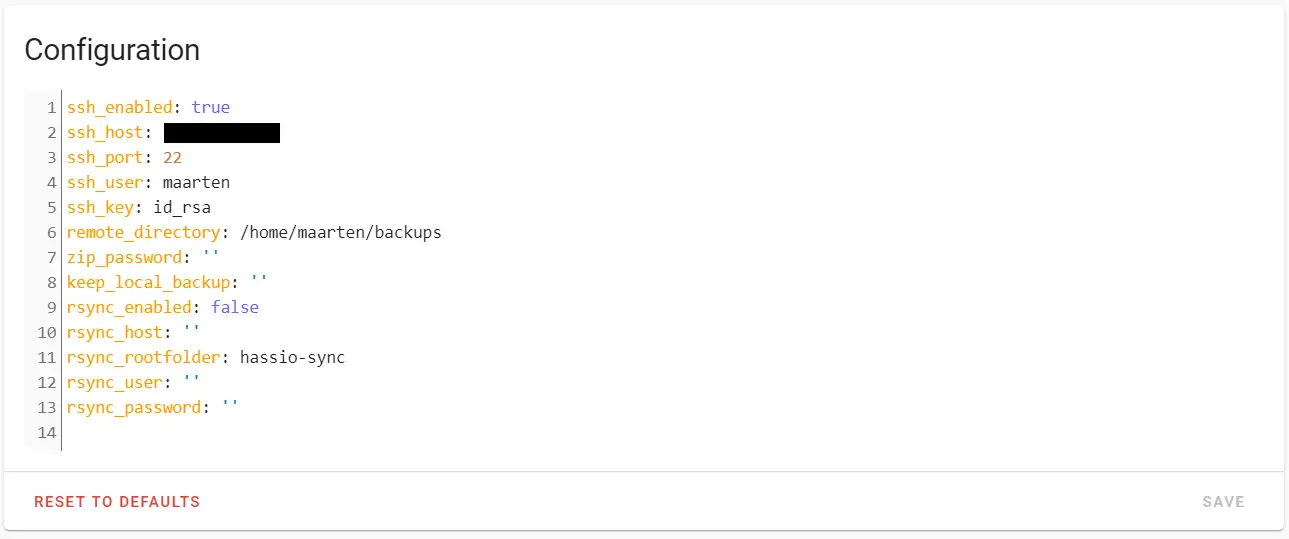
cp id_rsa /ssl - Now it time to configure the add-on. I used the following configuration. Make sure change it to reflect your environment:
- The configuration is ready, now you can call the back-up from an automation. Here is an example action:
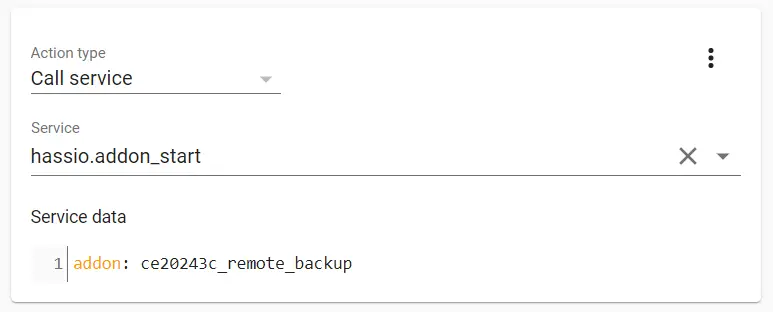
Now once the automation has run you should end up with a snapshot on your remote location. I recommend this method to more advanced user as I find it quite complex to setup. But I can imagine that if you are able to run your own sever you will be just fine with this back-up add-on.
Monitoring your Home Assistant back-up using notifications
Now we got it all covered right, a scheduled back-up and a copy to one of your favorite cloud providers. The problem is that it will probably work alright for years to come but what if something runs into an error?
The best way to cover this is to periodically check your snapshots, and also make sure you can restore them. If you are serious about your home automation system, I really advise you to do this. However I can imagine that you don’t always have the time to go ahead and do restore testing.
One good way to make at least sure the back-up is running, is to send out a notification to your favorite platform (Home Assistant has loads of integrations such as Telegram, Slack just to name a few.) In this example we will send out a notification to a smartphone. This will give you a push message from the Home Assistant app that the back-up was run.
Here are the steps required in order to add a notification to our back-up automation:
- Go to configuration and automations. Open the back-up automation that we have previously created.
- Scroll all the way down to actions, and click on ADD ACTION.
- Select call service as action type, and enter the following parameters:
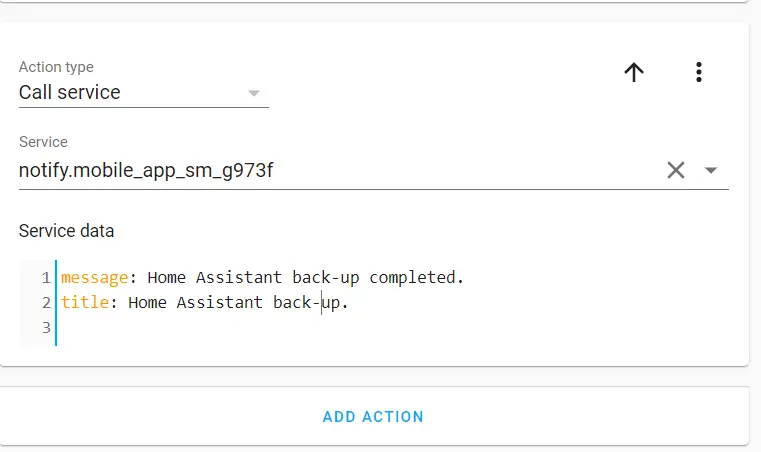
- Now save the automation. The next time the automation runs you will get a notification that it has been done. This is a great way to make sure your scheduled snapshot is running.
Restore options for Home Assistant supervisor based installation
In-place restore of a snapshot currently on the system
This is a very common situation, imagine just making a change to your running Home Assistant system but it wasn’t a very good one. Automations start crashing, wife unhappy, you know the deal. Its time to get quickly back on track using a snapshot restore. To do this follow the steps below.
- Go into Supervisor and go to the Snapshots tab.
- Click one of the snapshots we created previously.
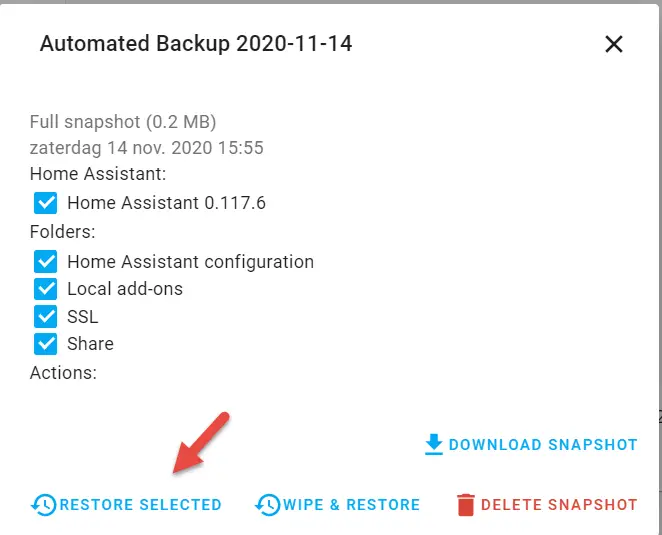
- Select the items that you want to restore:
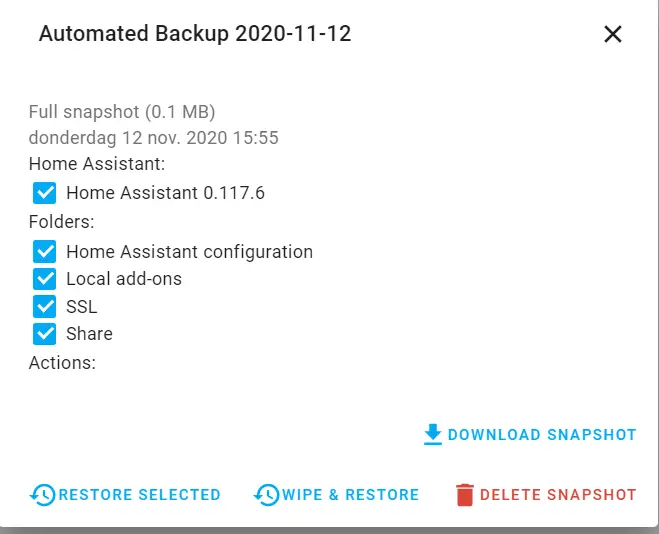
- Once you have made the selection click on RESTORE SELECTED
- In the confirmation box click on RESTORE
- It is ok if you lose your connection, because Home Assistant is restoring and it might take a while. It can take several minutes on a big installation.
- After waiting for some time your Home Assistant installation should be back on track into the configuration of the time of the snapshot.
Restore back-ups from the command line
Ok so, we made a bigger mistake this time and Home Assistant entirely crashed. We cannot even access the web interface of Home Assistant. Well lucky enough we have the option to restore Home Assistant from the command line as well. To do this follow the steps below:
- First connect to your machine using SSH, if this is no longer possible try if you can access the machine physically. If you run your Home Assistant installation in a Virtual Machine you can easily do this using VMware console. If you are using a Raspberry PI you can always hook-up a keyboard and monitor.
- Once you see the login prompt login as root. You should be welcomed to the Home Asssitant command line:
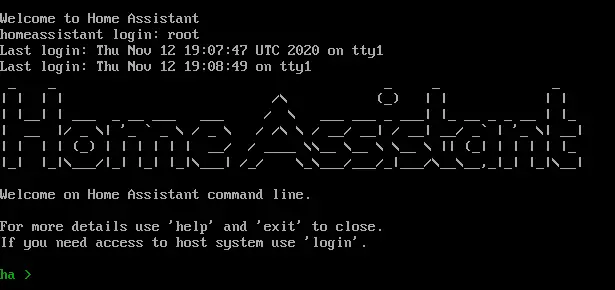
- Type
snapshotsto get a list of snapshots: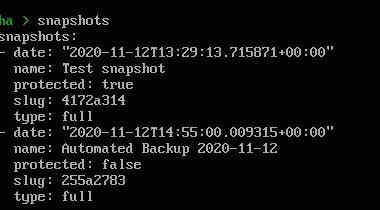
- Now type
snapshots restore <slug>
- The restore should now start. And once complete you are back at the point in time of the restore.
The command-line is great if Home Assistant has crashed but we are still able to access the console. Now what if total disaster strikes and we cannot even access the console. Onwards to the next paragraph, restore after a complete disaster.
Restore Home Assistant from snapshot after re-installing Home Assistant
So what if complete disaster has struck, and Home Assistant is completely unreachable but also your system is completely unreachable. There can be a couple of scenarios in which its not unthinkable that your Home Assistant installation will become totally unusable. Here are a few scenarios:
- If you are using a Raspberry PI its not unthinkable that the SD card becomes corrupt one day.
- you might be moving to a completely new system, maybe you are scaling up from a Raspberry PI to a bigger machine.
- Something has gone wrong updating your system.
These are just a few reasons why your Home Assistant install might need a restore from scratch. Here are the steps to get your Home Assistant configuration back into the system as soon as possible:
- Start by installing Home Assistant, make sure you do this with the Supervisor available. The most easy way is to pick one of the ready made images available.
- Next up we need to get the previously created and secure stored snapshot onto the new Home Assistant machine.
- The most easy way to do this is to install the Samba add-on from the addon-store. You can do this using the following steps:
– Go to the Supervisor, and click on add-on store.
– Search for samba and click on the add-on
– Click on INSTALL
– Once installed click on START to start the Samba add-on
– You may get an error when trying to start the Samba add-on, this is because you must set a password before you can start the actual add-on.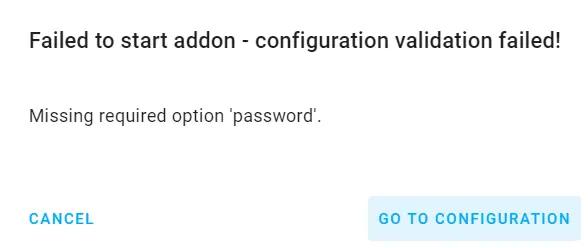
– If you get this error you need to enter a password and try again. The add-on should now start. - Now open the share on your computer. You can do this by typing: \\<IP or hostname>\ into Windows Explorer. You will be prompted for a username and password. Enter homeassistant as the user, and your previously set password.
- Now copy the created snapshot file into the backup share.
- Next up, go to Home Assistant and go to Supervisor.
- Then go into the snapshot tab.
- Click the snapshot you copied.
- Because this is a brand new install, restore all of the configuration and add-ons. Click on RESTORE SELECTED.
- Wait for the restore process to finish. This can take up to several minutes. The Home Assistant UI should restart once it has been finished.
Home Assistant installed on a host OS (Home Assistant core system)
If you went the route of installing Home Assistant yourself. You will most likely have used at least a containerized system such as docker. I have used this type of configuration in the past. The bad news is that you won’t have to easy options that Supervisor provides with this type of installation. But there is a lot of other back-up methods out there. I have used the following docker-compose configuration in order to set-up Home Assistant:
version: '3'
services:
  homeassistant:
    container_name: homeassistant
    image: homeassistant/home-assistant:stable
    volumes:
      - /data/HA/config:/config
      - /dev/serial/by-id/:/dev/serial/by-id/
    environment:
      - TZ=Europe/Amsterdam
    restart: always
    network_mode: host
    devices:
      - /dev/ttyUSB0:/dev/ttyUSB0
      - /dev/ttyUSB1:/dev/ttyUSB1
      - /dev/ttyACM0:/dev/ttyACM0
  mqtt:
    image: eclipse-mosquitto:latest
    container_name: "mqtt"
    restart: always
    ports:
      - 1883:1883
      - 9001:9001
    volumes:
      - /data/HA/mqtt/config:/mosquitto/config
      - /data/HA/mqtt/data:/mosquitto/data
      - /data/HA/mqtt/log:/mosquitto/log
    network_mode: "host"
    environment:
      - TZ=Europe/Amsterdam
As you can see all my data is stored in the /data/HA folder. So it basically a matter of making sure that I have this folder in my back-up. There are literally 1000’s of back-up options available. But these go beyond the scope of this article.
Conclusion and wrap-up
In this article we have taken a look at all the different options that there are available for Home Assistant back-up. There are really good automated and off-site back-up strategies available. So really there is no excuse not to make a back-up of your Home Assistant install.
Creating regular back-ups also ensures that you can easily recover the Home Assistant installation should this be necessary. Lets face it, we become more and more dependant on the easy of use of Home Assistant in our every day lives. So creating a back-up surely is a good idea to quickly get back on track.
2 thoughts on “How do I back-up Home Assistant?”
Comments are closed.
Recent Posts
The time is finally come! Samsung have released their Galaxy Watch 4 series of watches. It features Google Wear OS 3. and it comes in two models, being the standard model and the watch 4 classic. In...
Microsoft 365 Defender cross check with on-premises Active Directory
Recently I was reviewing the new Microsoft 365 Defender portal and I noticed that a few endpoints were missing from the device inventory. This got me thinking that it would be great if I could...
Thanks for adding my addon to your blog post, if you have any suggestions or bug reports just open an issue on that addon’s repo