
In a previous blog post we had a look at connecting an
Connecting the CCS811 sensor
We begin by connecting the hardware sensor. The CCS811 has five pins that we need to connect. The following pins are used:
| CCS811 | ESP8266 |
| VDD | 3V3 |
| GND | GND |
| SDA | SDA |
| SCL | SCL |
| nWAKE | Digital pin or GND |
As you can see the nWAKE can be configured in two ways. When we use a digital pin, the sleep mode of the CCS811 can be used. But when we connect the nWAKE pin to GND the CCS811 will be in constant on mode. For the sake of testing we will connect this sensor on a breadboard. I have created a Fritzing image so you can see the wiring.

Arduino sketch
Now that we have the sensor connected to our ESP8266. We can create an Arduino sketch in order to send data to the Azure IoT Hub. I have modified the iot-hub-feather-huzzah-client-app-master sample code in order to make it work with the CCS811 sensor. Most of the heavy lifting to make the CO2 sensor work, was already done by Maarten Pennings. He created an excellent Arduino library for this sensor, you can find his library here.
For my sketch to work, you need to the following libraries:
- AzureIoTHub
- AzureIoTUtility
- AzureIoTProtocol_MQTT
- ArduinoJson
- CCS811 sensor library
- Adafruit Unified Sensor
The complete sketch can be found on my Github page here.
In order to use the sketch you need to enter three parameters in app.ino:
- WIFI SSID
- WIFI Password
- Azure IoT Connectionstring as shown in previous article.
Receive CO2 sensor data on the Azure IoT Hub
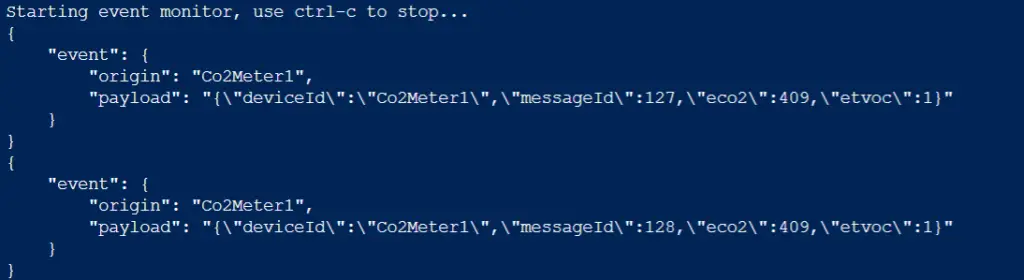
Now that we have the hardware and software ready. We can verify whether data is being received on the Azure IoT Hub. We use the same commands as we used in our previous Azure IoT blog post. And fair enough CO2 sensor data is being received!
In an upcoming article we will take a look at visualizing these data received using the Azure IoT Hub and PowerBI.
Recent Posts
The time is finally come! Samsung have released their Galaxy Watch 4 series of watches. It features Google Wear OS 3. and it comes in two models, being the standard model and the watch 4 classic. In...
Microsoft 365 Defender cross check with on-premises Active Directory
Recently I was reviewing the new Microsoft 365 Defender portal and I noticed that a few endpoints were missing from the device inventory. This got me thinking that it would be great if I could...