It has been two weeks ago since I released the first (private) beta version of HouseAgent. A handful of people starting testing and playing with it, and I noticed that documentation and instructions are lacking a bit.
In this blog post I will guide you through the process (in very basic steps) of installing the core of HouseAgent. The good news is, that this will get core of HouseAgent up and running. The bad news is that you can’t do anything with, not without plug-ins at least. I will dive into the subject of installing plug-ins in another blog post.
Step 1: installation of RabbitMQ (and Erlang)
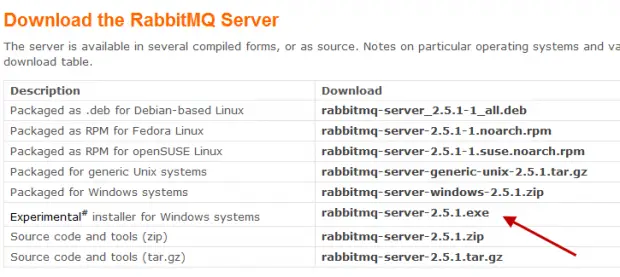
RabbitMQ is the message broker required by HouseAgent, you can download it from here.
You need the server with Windows installer:
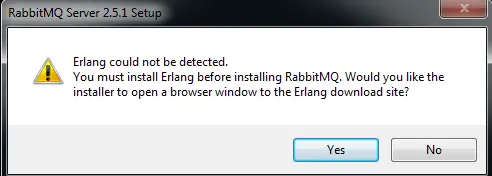
After you have started the RabbitMQ setup, it will alert you that you also need Erlang:

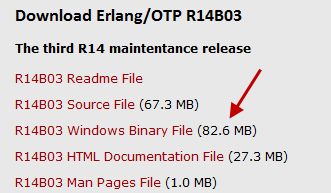
Go ahead and download and install the latest Erlang version, choose the Windows binary form:
Now complete the installation of both Erlang and RabbitMQ, the default settings will suffice.
Step 2: Installation of HouseAgent
Download the latest beta release from the HouseAgent forum. And start the HouseAgent installation.
It’s an easy next->next->finish installation.
Step 3: Enjoy HouseAgent
Congratulations! You should now be ready to use HouseAgent!
There’s a HouseAgent start menu group in the start menu to get you going.


I am a little bit late to the party. I hope you still read this.
I Know. It is always nice to create something yourself. But please do yourself the favor to checkout Home-Assistant at https://www.home-assistant.io/
A fellow Dutchy
Richard
Hah, so nice to receive a reaction after all these years.
I am a happy Home Assistant since a few months. Before that I used OpenHAB for a couple of years.
Home Assistant is so impressive, just no need for any own development anymore.
Thanks for your reply 🙂
graag gedaan!